














The truss rod is the steel bar inside your guitar’s neck that counteracts string tension and controls neck curvature, and without it working correctly, your action, intonation, and long-term neck health all suffer.
- Playability: Too much or too little neck relief causes fret buzz, high action, or dead notes that no amount of picking technique can fix.
- Structural protection: Steel strings exert 100–180 pounds of combined tension on the neck. The truss rod is what keeps that force from slowly warping the wood.
- When to act: Check relief when you change string gauges, shift tunings, or notice buzzing. Small adjustments matter; severe bowing, twists, or a seized rod belong with a luthier.
Key Takeaways
The truss rod controls neck relief against string tension, and keeping it correctly set is the single most direct lever you have over playability and long-term neck health.
| Point | Details |
|---|---|
| Core function | The rod counteracts string tension to maintain controlled neck relief, affecting action and buzz. |
| Measurement method | Fret first and last frets, measure the gap at the 7th fret; many electrics target ~0.007 inches. |
| Safe adjustment limit | Work in 1/8-turn increments, retune and wait between turns, and stop immediately if the rod resists. |
| Rod type matters | Single-action rods correct forward bow only; dual-action rods handle both directions; static systems cannot be adjusted. |
| When to call a luthier | Twisted necks, seized rods, stripped nuts, snapped rods, and severe warps are all beyond DIY correction. |
Table of Contents
- What is a truss rod and where does it live?
- Why truss rods are important: the mechanics of tension and relief
- How a properly set truss rod affects playability and tone
- What are the differences between truss rod types?
- Signs your neck relief needs attention
- How to check neck relief at the 7th fret
- Safe truss rod adjustment: step-by-step
- What a truss rod cannot fix
- Routine care to keep your neck stable
- Common truss-rod problems and practical fixes
- Luthier-backed tips and manufacturer guidelines
- Why truss rod care matters more on vintage instruments
- Sources
What is a truss rod and where does it live?
A truss rod is a steel bar or rod embedded lengthwise inside the guitar neck, running beneath the fingerboard from the nut end toward the body joint. On most electric guitars and many acoustics, you access the adjustment nut at the headstock, often hidden under a small plastic cover. Some guitars, particularly older acoustics and certain classical-style builds, route the nut to the heel of the neck, which means you need to loosen the neck joint or remove the neck entirely to reach it.
Mentally picture the neck in cross-section: the fingerboard sits on top, the truss rod runs just below it, and the rest of the neck wood wraps around both. That position lets the rod apply a counterforce directly against the pull of the strings.
The three main types:
| Type | What it does | Adjustment |
|---|---|---|
| Static (T-bar, embedded bar) | Adds rigidity; cannot be adjusted | None |
| Single-action | Corrects forward bow (up-bow) only | One nut, typically at headstock |
| Dual-action (two-way) | Corrects both forward bow and back-bow | One or two nuts; more versatile |
- Static systems appear on many older acoustics and some classical builds. They add stiffness and weight but offer zero adjustability once installed.
- Single-action rods are the most common type on production electrics and acoustics. Tightening the nut pulls the neck back; loosening it allows more forward relief.
- Dual-action rods can push the neck in either direction, which makes them useful when a neck has developed back-bow from over-tightening or from very light strings.
Why truss rods are important: the mechanics of tension and relief
Strings pull the headstock forward with a combined force of 100–180 pounds on steel-string guitars. Left unchecked, that tension would gradually bend the neck into a pronounced forward curve. The truss rod applies tension in the opposite direction, letting you dial in a controlled, slight forward curve called relief.
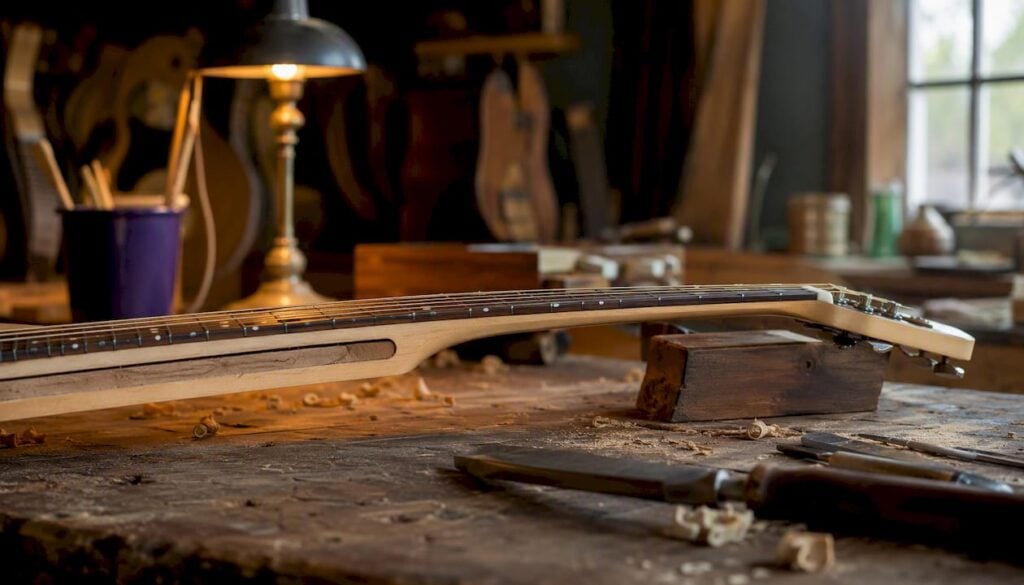
Relief is not a flaw. A small amount of forward bow gives the strings room to vibrate in their natural arc, especially in the lower positions. Too little relief and the strings hit the frets mid-vibration, producing buzz. Too much and the action climbs so high that fretting becomes a workout.
How rod tension changes the neck:
- Tighten the nut (clockwise): Increases rod tension, straightens or back-bows the neck, reduces relief.
- Loosen the nut (counter-clockwise): Decreases rod tension, allows more forward bow, increases relief.
- Effect on buzz: Excess relief raises action and can cause buzz at higher frets; insufficient relief causes buzz at lower frets.
- Effect on intonation feel: A neck with too much bow makes the middle-register notes feel sharp and stiff to fret.
Warning: Never force a truss rod nut that resists turning. A seized or maxed-out rod can snap under excess torque, turning a simple adjustment into a costly repair.
Pro Tip: Before touching the adjustment nut, tune the guitar to pitch. The rod is calibrated against string tension, so measuring or adjusting with slack strings gives you a false reading.
How a properly set truss rod affects playability and tone
The truss rod’s job is to control neck curvature, not to set action directly. Action is primarily determined by nut slot depth and saddle height. That distinction matters because players who crank the rod trying to lower action often end up with back-bow, buzz across the entire neck, or a snapped rod.
What the rod does affect, practically speaking:
- Fret buzz: Incorrect relief is one of the two most common causes of buzz, alongside nut and saddle height.
- Action across the neck: Relief changes how the string height feels in the first through twelfth positions, even when nut and saddle heights stay fixed.
- Sustain and high-end response: A stable, well-installed truss-rod system contributes to sustain and clarity. A loose or poorly installed rod can introduce sympathetic vibrations and dead spots that rob the instrument of tone.
- Neck warp prevention: Over years, unchecked string tension can permanently deform neck wood. Regular relief checks catch drift before it becomes structural damage.
Consider a practical scenario: you switch from .009 gauge strings to .011s on your electric. Heavier strings pull harder, increasing forward bow. Without a truss rod adjustment to compensate, the action climbs noticeably by the fifth fret and buzz appears in the lower positions. One small rod turn, done correctly, restores the geometry. That’s the rod doing exactly what it was designed to do.
The truss rod is one element of a complete setup. Nut slots, saddle height, and neck angle all interact with relief. Adjusting the rod without considering those other variables can solve one problem and create another.
What are the differences between truss rod types?
Single-action rods correct up-bow by tightening, but cannot push the neck forward if it has developed back-bow. If you over-tighten a single-action rod and the neck goes into back-bow, your only option is to loosen it and wait for the wood to relax, or have a luthier apply heat and clamping. That limitation is worth knowing before you make a large adjustment.
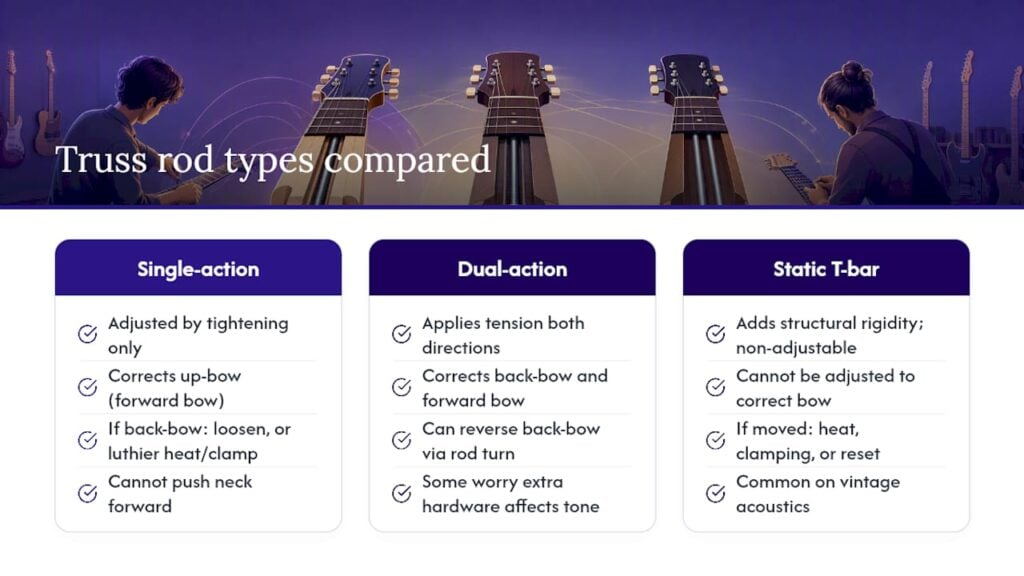
Dual-action rods solve that problem. Because they can apply tension in both directions, they can correct back-bow as well as forward bow. Some players worry that the additional hardware affects tone, and a few boutique builders share that concern, which is why certain high-end acoustics still use static systems or combine a rigidity bar with a separate adjustable rod.
Pro Tip: Static T-bar systems, common on vintage acoustics, add structural rigidity but cannot be adjusted. If you own a vintage instrument with a static system and the neck has moved, the fix involves heat, clamping, or a neck reset — not a rod turn. Knowing which system your guitar has before attempting any adjustment saves you from a frustrating dead end.
Some modern builders blend both approaches: a carbon-fiber or steel stabilization bar for rigidity, plus an adjustable rod for fine-tuning. The result is a neck that resists seasonal movement while still allowing correction when needed. For collectors and players of vintage and handcrafted guitars, identifying the rod type before any adjustment is the first step.
Signs your neck relief needs attention
Most players notice something feels off before they think to check the truss rod. These are the symptoms worth taking seriously:
- Fret buzz in the lower positions (frets 1–5): Often points to insufficient relief; the strings are hitting frets during their vibration arc.
- High action around the 5th–9th frets: Excess forward bow pushes the strings away from the fingerboard in the middle of the neck.
- Visible forward bow: Sight down the neck from the headstock. A pronounced curve between the nut and the body joint is a clear signal.
- Back-bow: The neck curves backward (concave from the string’s perspective), causing buzz across most of the neck and a stiff, unpleasant feel.
- Dead notes or rattles: Particularly suspicious if they appeared suddenly after a seasonal change or a string-gauge swap.
- Seasonal onset: Symptoms that appear in winter (dry air, wood contracts) or summer (humidity, wood swells) often trace back to neck movement rather than a setup problem.
A quick visual check takes thirty seconds. Tune to pitch, hold the guitar at eye level, and look down the neck from the headstock toward the body. The fingerboard should show a very slight forward curve. Anything dramatic in either direction warrants a measurement.
How to check neck relief at the 7th fret
This is the method luthiers and technicians use, and you can do it at home with a capo and a feeler gauge.
- Tune the guitar to your normal playing pitch. Relief is a function of string tension, so the measurement only means something under real playing conditions.
- Fret the first fret (or clamp a capo there) and fret the last fret on the same string simultaneously. Use the low E string for consistency.
- Look at the gap between the bottom of the string and the top of the 7th fret. That gap is your relief measurement.
- Measure with a feeler gauge. Slide the appropriate blade under the string at the 7th fret until you find the one that fits snugly without lifting the string.
- Compare to the guideline. Many manufacturers recommend approximately 0.007 inches of relief at the 7th fret for electric guitars. Acoustics often run slightly higher, around 0.010–0.012 inches, to accommodate larger string vibration.
- Record your result along with string gauge, tuning, and the date. That baseline makes future checks far more useful.
Pro Tip: If you don’t have a feeler gauge, a high-E string from a standard .009 set is approximately 0.009 inches thick and works as a rough reference. It’s not a substitute for a proper gauge set, but it tells you whether you’re in the ballpark.
The 0.007-inch figure is a common guideline, not a universal law. Playing style matters: aggressive strummers and flatpickers often prefer slightly more relief to avoid buzz under heavy attack. Fingerstyle players sometimes run closer to flat. Use the number as a starting point, then adjust to how the guitar actually plays.
Safe truss rod adjustment: step-by-step
Read this fully before touching the nut. Most truss-rod damage comes from impatience.
- Confirm your tool. Most modern guitars use a hex (Allen) wrench or a socket wrench. Using the wrong size strips the nut.
- Tune to pitch and measure relief using the method above. Write down the current measurement.
- Determine the direction. Too much relief (forward bow): tighten the nut clockwise. Too little relief or back-bow: loosen counter-clockwise.
- Turn in 1/8-turn increments. Professionals advise tiny adjustments, commonly 1/8 turn, and allowing wood to settle between checks. The wood needs time to respond.
- Retune and wait. Give the neck at least a few minutes, longer for large adjustments or in extreme temperatures.
- Remeasure at the 7th fret. Compare to your target. Repeat in 1/8-turn steps until you reach it.
Do:
- Use the correct wrench size every time.
- Work at room temperature; cold or very hot conditions affect wood response.
- Log string gauge, tuning, and environmental conditions with each adjustment.
Don’t:
- Force a nut that resists. Stop immediately.
- Make large turns in one go, hoping to skip steps.
- Adjust with the strings slack; you’ll overshoot.
Safety warning: If the rod feels stiff, gritty, or refuses to turn, stop. A seized rod or one that has reached its mechanical limit can snap under additional torque. That repair typically requires neck removal and is significantly more expensive than a luthier visit.
Pro Tip: Keep a small notebook or phone note for each guitar you own: string gauge, tuning, date of last adjustment, and the measured relief. When symptoms return months later, that record tells you exactly how much the neck has moved and in which direction.
What a truss rod cannot fix
The rod controls curvature along one axis. It cannot address problems that fall outside that function:
- Twisted necks: A twist means the bass side and treble side of the neck are at different angles. No rod adjustment corrects this; it requires heat, clamping, or in severe cases, neck replacement.
- Severe warps: Deep, permanent deformation beyond what the rod can counteract needs professional intervention.
- Fretwork problems: High frets, worn frets, or uneven fret leveling cause buzz and dead spots that relief adjustment will not fix.
- Broken or stripped rods: A snapped rod or a stripped adjustment nut requires neck removal to repair or replace.
- Structural cracks: Cracks in the neck wood or at the heel joint are luthier territory, full stop.
When you take a guitar to a technician, describe the symptoms specifically: where the buzz occurs (which frets, which strings), when it started, what changed before it appeared (new strings, season change, travel). That information helps the tech diagnose faster and give you an accurate estimate. When in doubt about any neck problem, consult a qualified luthier rather than experimenting further.
Routine care to keep your neck stable
Prevention is cheaper than repair. These habits keep truss-rod problems from developing in the first place:
- Control humidity. Wood expands and contracts with moisture changes. Keep your guitar in an environment between 45–55% relative humidity. A case humidifier costs a few dollars and protects a neck worth far more.
- Check relief seasonally. Measure at the start of winter and summer, when humidity swings are largest. A proper storage routine reduces how much the neck moves between checks.
- Adjust after gauge or tuning changes. Switching string gauges or moving to a lower tuning changes the tension load. Check relief within a week of any such change.
- Inspect hardware. A loose tuner or nut can create rattles that mimic truss-rod symptoms. Rule out loose hardware before assuming the rod is the problem.
- Include the rod in your setup routine. When you check nut slots and saddle height, measure relief too. The three interact, and catching a small drift early prevents a larger correction later.
Pro Tip: Mark your baseline relief measurement for each guitar on a small piece of tape inside the case, or in a notes app. When a guitar starts feeling off, you have a reference point to compare against rather than guessing what “normal” feels like for that specific instrument.
For acoustic guitar maintenance, humidity control is especially critical because acoustic tops and necks are thinner and more responsive to moisture changes than most electric builds.
Common truss-rod problems and practical fixes
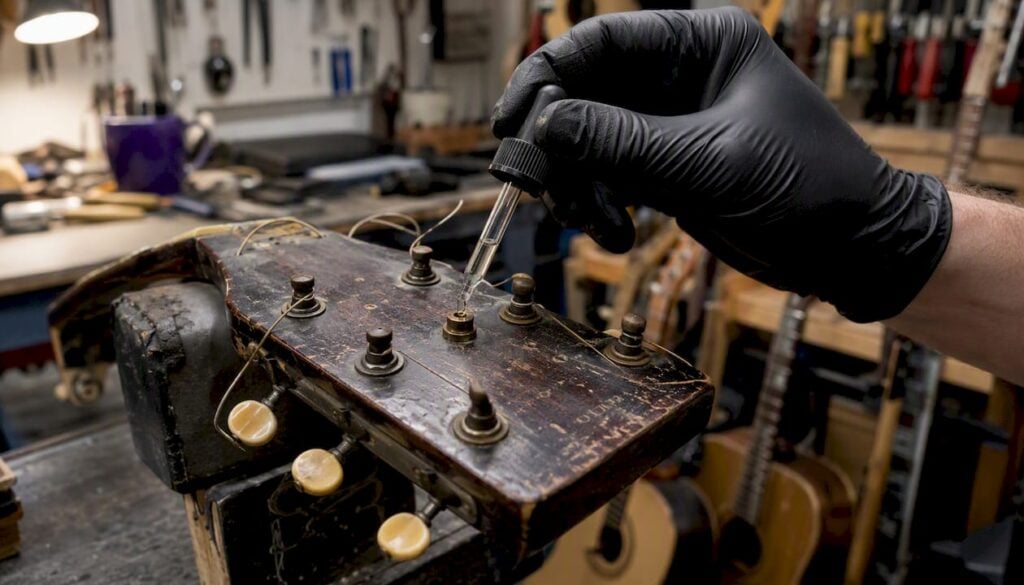
Seized rod: The nut turns but nothing happens, or it refuses to turn at all. Try a drop of penetrating oil at the nut threads and wait 24 hours before attempting another 1/8 turn. If it still resists, stop and see a technician.
Stripped adjustment nut: The wrench spins without gripping. Do not continue; you’ll make it worse. A luthier can often extract a stripped nut with specialized tools, but forcing it can damage the rod itself.
Intermittent rattle or buzz: If the sound appears at specific notes and doesn’t correlate with fret position, the rod itself may be loose inside the channel. This is a known issue with poorly installed or worn rod systems and requires a technician to diagnose and stabilize.
Snapped rod: You’ll know immediately; the nut suddenly offers zero resistance and the neck may visibly bow forward. This is not a DIY repair.
A broken truss rod typically requires removing the fingerboard or the entire neck to access and replace the rod. On a production guitar, that repair can cost several hundred dollars. On a vintage or rare instrument, the work must be done by someone experienced with period-correct methods to preserve the instrument’s value. Document the symptoms, photograph the neck, and get an estimate before authorizing any work.
Luthier-backed tips and manufacturer guidelines
The 0.007-inch relief guideline at the 7th fret is cited by multiple electric guitar manufacturers as a common starting point. It is a benchmark, not a specification that applies to every player or every guitar. Acoustics, classical instruments, and slide guitars all use different targets.
What luthiers consistently agree on: the adjustment rhythm matters as much as the direction. Turn 1/8 of a rotation, retune, wait for the wood to settle (anywhere from a few minutes to several hours in extreme cases), then remeasure. Rushing through multiple turns in one session is how players overshoot and create new problems.
Modern adjustable rods are designed to be used. Fear of touching the rod is often misplaced; with the correct tool, patience, and a feeler gauge, owner adjustments are safe in the vast majority of cases. The truss rod enabled the steel-string guitar neck designs that define modern playability. Before adjustable rods became standard, neck geometry was fixed at the factory and players had no recourse when the wood moved.
Pro Tip: Log the environmental conditions (temperature and humidity) alongside your relief measurements. A neck that reads 0.009 inches in July and 0.005 inches in January isn’t drifting randomly — it’s responding to seasonal humidity changes. That pattern tells you exactly when to check and how much to expect to adjust.
Why truss rod care matters more on vintage instruments
At Vintage-guitar-world, we handle instruments where the truss rod is often decades old, sometimes a single-action design from an era before dual-action rods were standard, and occasionally a static system with no adjustment at all. The stakes on a vintage or handcrafted guitar are higher than on a production instrument: a mishandled rod adjustment on a 1960s neck can cause damage that affects both playability and collector value in ways that are difficult or impossible to reverse.
Our position is straightforward. For most players, understanding the truss rod well enough to measure relief, recognize symptoms, and make small corrections is genuinely useful knowledge. But when a vintage neck shows a twist, when a rod feels seized, or when the symptoms don’t resolve after a careful 1/8-turn adjustment, the right move is a professional setup. We offer guitar testing appointments precisely for situations where a player wants expert eyes on the instrument before committing to any adjustment.
The instruments we curate at Vintage-guitar-world are evaluated for neck health as part of our standard process. A guitar with a compromised truss-rod system doesn’t make it into our collection without full disclosure and, where possible, professional remediation first.
Sources
- How to adjust a guitar truss rod | MusicRadar
- Guitar truss rods: everything you need to know | Guitar World
- Guitar
- Truss-Rod Care & Guitar-Neck Health | Premier Guitar
- What Does a Guitar’s Truss Rod Do? | Taylor Guitars