












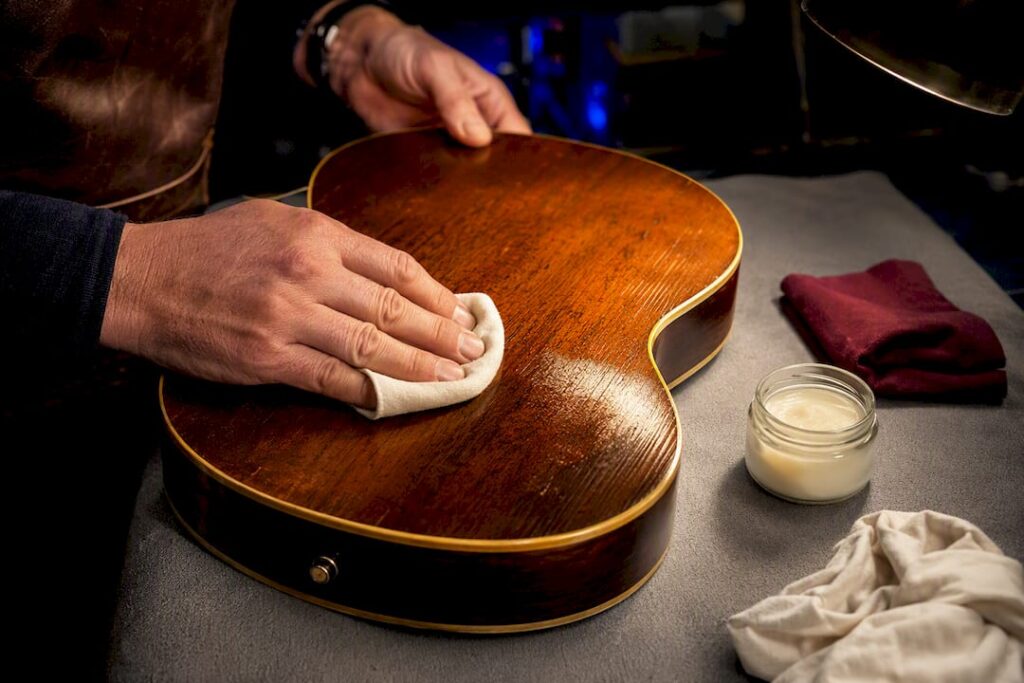

Wipe your guitar down with a clean, dry cloth after every session, and never reach for polish until you know what finish you’re touching. Nitrocellulose, shellac, and oiled wood each demand a different approach, and the wrong product can strip decades of character in seconds. If you can’t identify the finish with confidence, stay conservative, avoid solvents, and get a qualified restorer to look at it before you do anything else.
TL;DR:
- Avoid using household polishes or alcohol on vintage finishes, as they can soften or cloud nitrocellulose and shellac surfaces.
- Polishing polyurethane guitars is more forgiving, allowing safe use of commercial instrument polishes, unlike nitro or shellac finishes that require specialized products.
- Proper identification of the finish based on age, appearance, and tactile clues is essential, with nitro and shellac needing the most delicate care.
- Deep scratches, finish lifting, or color-changing effects from cleaning indicate that professional restoration may be necessary.
- Respect the guitar’s natural wear and checking, as these features are part of its value and character, and minimal, reversible maintenance is always preferred.
Table of Contents
- Gitarre Polieren Vintage: What to Gather Before You Start
- How Do You Identify Your Guitar’s Finish?
- Step-by-Step Cleaning and Polishing by Finish Type
- Specialist Care for Nitro and Shellac Finishes
- When Should You Call a Restoration Specialist?
- Publisher Perspective: Preserve Character, Not Just Shine
- Restoration, Appraisal, and Testing Services From Vintage Guitar World
- Sources
- FAQ
Gitarre Polieren Vintage: What to Gather Before You Start
Rushing into a cleaning session with whatever’s under the kitchen sink is how collectors ruin fifty-year-old lacquer. Gather the right materials first, because half of doing this safely is what you don’t pick up.
-
Cloths: lint-free cotton or high-quality microfiber. Skip paper towels; they’re abrasive enough to leave micro-scratches on soft nitro.
-
Cleaners to keep: mild soap and water, and a nitro-safe instrument polish for heavier grime.
-
Cleaners to avoid: silicone polishes, WD-40, generic household furniture polish, and alcohol on nitro finishes.
-
Tools: 0000 steel wool (oiled finishes only), a soft brush for dust in tight spots, a plastic razor for stickers, and a padded, well-lit workspace
-
Prep steps: photograph the guitar from several angles, clear your bench, tape off pickups and electronics, and pick an inconspicuous spot for a test.
Pro Tip: Photograph the guitar under the same lighting every time you clean it. Side-by-side shots over months are the easiest way to catch finish changes before they become a real problem.
How Do You Identify Your Guitar’s Finish?
You cannot polish safely until you know what’s actually on the wood. Guessing is how a $3,000 instrument becomes a $1,500 instrument.
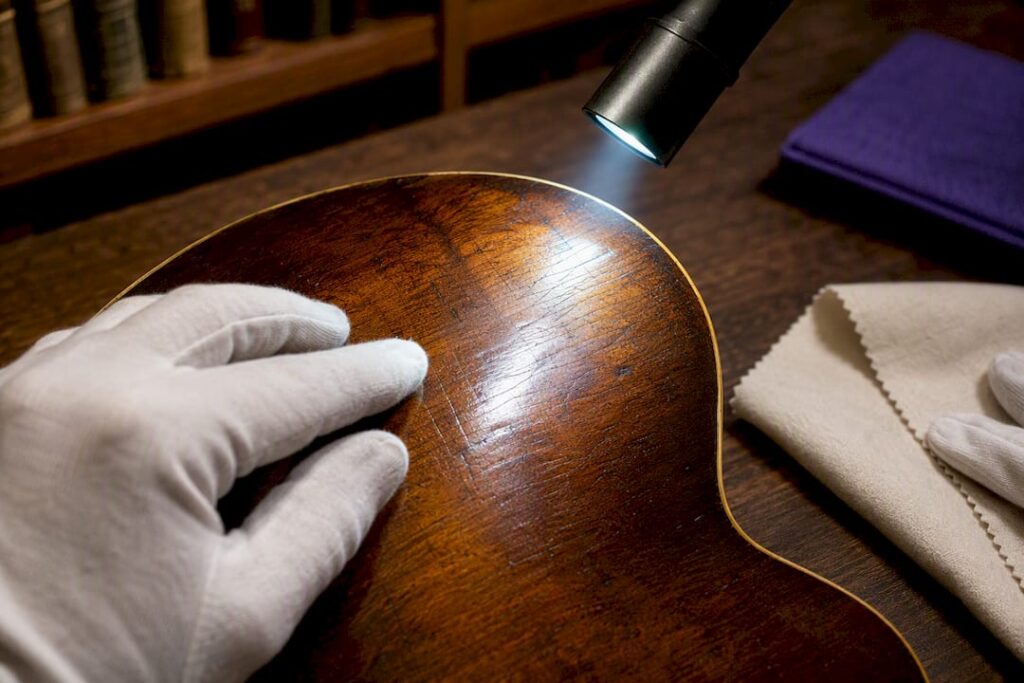
Age and origin give the first clue. Instruments built before the 1970s, especially American and European models, are overwhelmingly finished in nitrocellulose lacquer or, on older classical and flamenco guitars, shellac. Mass-market guitars from the 1980s onward lean heavily on polyurethane, which is thicker, more chemically inert, and far more tolerant of everyday polish.
Visual and tactile clues narrow it further:
- Checking (fine cracking): a strong sign of nitrocellulose, which shrinks slightly over decades.
- Thin, glass-smooth surface that feels slightly soft or tacky in heat: likely nitro or shellac.
- Thick, glossy, plastic-feeling shell that resists a fingernail press: almost certainly polyurethane.
- Matte or satin texture with visible wood grain: oiled or waxed finish, common on some acoustic and classical necks.
- A cloudy ring after a drop of water sits too long: shellac, which is notoriously water-sensitive.
Different finish categories genuinely require different care approaches: polyurethane tolerates a wider range of commercial products, while nitro and matte finishes need far gentler handling. If you’re still unsure after these checks, our guide to guitar varnish types walks through the visual differences in more detail. When in doubt, treat the guitar as if it were nitro, since that’s the least forgiving finish on this list.
Step-by-Step Cleaning and Polishing by Finish Type
Work from least invasive to most invasive, and stop the moment something looks off.
Daily care, every finish:
- Wipe strings and neck with a dry microfiber cloth right after playing to remove sweat and oil.
- For a deeper wipe, dampen a cloth slightly, run it over the body, and buff dry immediately. Never let moisture sit.
Polyurethane finishes:
- Use a light automotive-style guitar polish designed for gloss finishes.
- Apply in small circular motions, then buff with a dry microfiber cloth. Poly is forgiving enough to handle most name-brand instrument polishes.
Nitrocellulose finishes:
- Start with a dry, then barely damp, microfiber wipe.
- For stubborn grime, a small amount of naphtha (lighter fluid) on a cloth lifts residue without attacking the lacquer, applied sparingly and wiped off fast.
- Finish with a nitro-safe, silicone-free polish. Products like Behlen OZ Cream Polish and Joha lacquer cleaner are built specifically for this finish and won’t leave a silicone film that traps moisture or clouds the surface.
- Never use silicone-based car wax or alcohol. Both can soften nitro and erase the checking collectors actually value.
Shellac finishes:
- Practice the technique on a scrap piece of finished wood before touching the instrument.
- Use a polierballen (a cotton wad wrapped in fine cloth) charged lightly with shellac dissolved in spiritus, following the layered French-polish technique.
- Work in thin, overlapping passes, letting each layer dry fully between sessions.
- Finish with a very light oil pass to reduce drag, then let the surface cure for at least a day before handling.
Oiled and waxed finishes:
- Rub gently with 0000 steel wool along the grain, using a small amount of compatible oil.
- Wipe away all residue with a dry cloth; leftover oil attracts dust and grime.
Stickers and nicotine residue: try a plastic razor first. If solvent is unavoidable, test it on a hidden spot and use it sparingly. Keep all cleaners away from open pickup cavities and electronics.
Pro Tip: When cleaning around a nitro-finished pickguard, work outward from the edges rather than in circles. Circular motion concentrates solvent in one spot, which is exactly where clouding starts.
Specialist Care for Nitro and Shellac Finishes
Nitro and shellac cause more collector anxiety than any other finish category, and for good reason: both stay chemically active for the life of the instrument. Nitrocellulose lacquer is reactive indefinitely, meaning a fifty-year-old finish can still soften or discolor on contact with silicone or alcohol, the same way it would have the week it was sprayed. That reactivity is also why checking forms in the first place, and why sanding it away destroys the exact patina collectors pay a premium for.
Safe nitro approaches worth keeping on your shelf:
- Behlen OZ Cream Polish, silicone-free and formulated for lacquer.
- Joha lacquer cleaner, a European standard among luthiers for nitro upkeep.
- General nitro-safe instrument polishes that explicitly list “silicone-free” on the label.
Shellac calls for an entirely different skill set. The polierballen method builds up thin shellac layers dissolved in spiritus, producing a delicate, warm sheen that enhances the wood grain rather than masking it. Patience matters more than product here: light passes over multiple sessions beat one aggressive attempt every time.
Three failure modes account for most of the damage collectors report: aggressive sanding, attempts to physically remove checking, and silicone-based car polishes applied “just this once.” All three are effectively irreversible.
When Should You Call a Restoration Specialist?
Some conditions are beyond safe DIY territory, no matter how careful you are.
- Loose or buzzing braces, visible structural cracks, or exposed bare wood.
- Deep finish flaking or lacquer lifting at the edges.
- Cleaning that visibly changes color, increases checking, or leaves a hazy residue behind.
- Any doubt about whether a cleaning step is reversible.
Document condition with photos before attempting anything, and think twice before “fixing” cosmetic issues on an instrument you might sell. Refinishing, hardware swaps, and aggressive cleaning are among the fastest ways to erase collector value. When a guitar’s history matters as much as its sound, an appraisal before restoration is worth more than any polish.
Publisher Perspective: Preserve Character, Not Just Shine
Most cleaning advice online chases gloss. This site does not. A guitar’s checking, dulled edges, and worn finish are part of its documented history, and collectors consistently value that provenance over a showroom shine. Every intervention should be minimal, reversible, and recorded. The goal isn’t a guitar that looks new. It’s one that still looks like itself.
— Vintage
Restoration, Appraisal, and Testing Services From Vintage Guitar World
Some jobs go past what a cloth and a nitro-safe polish can fix, and that’s exactly where expert restoration services are needed. Where a general repair shop might refinish first and ask questions later, a careful restoration approach centers on documented, reversible work that respects the instrument’s original character rather than erasing it.

If your guitar shows structural wear, deep finish damage, or you simply want a professional read on its condition before you touch it, our restoration workflow walks through exactly how we assess and treat vintage finishes. Curious what a repair might run before you commit? Check current restoration cost guidance for a realistic range. And if you’re weighing whether a piece is worth restoring at all, book a testing appointment or request a certificate and value appraisal through our site to get expert eyes on it first.
Sources
- How to Care for a Vintage Guitar — Cleaning, Storage, and Maintenance – Moorland Distribution Ltd
- G&B-Basics: Gitarrenpflege – Reinigen & Polieren | GITARRE & BASS
- Schellackpolitur – Gitarre selber bauen
FAQ
Can I Use Regular Furniture Polish on a Vintage Guitar?
No. Household polishes often contain silicone or waxes that can cloud nitrocellulose lacquer and interfere with future repairs.
How Often Should I Polish a Vintage Guitar?
Wipe it down after every play session, but limit actual polish application to once every few weeks at most, and only after confirming your finish type.
Is It Safe to Remove Checking or Cracks in the Finish?
No. Checking is a natural aging sign that collectors value, and attempting to sand or fill it typically reduces both authenticity and resale value.
What Humidity Level Protects a Vintage Guitar’s Finish?
Keep relative humidity around 45–55% and store the instrument in a hard case to prevent finish and glue-joint damage.
Does Vintage Guitar World Offer Restoration Services?
Yes. Vintage Guitar World provides restoration, valuation, and certification services, with pricing details available on the restoration cost page.