














TL;DR:
- A thorough, hands-on inspection of vintage guitars is essential to identify hidden structural and electronic issues that can affect value and playability. Proper tools, controlled environment, detailed evaluation of neck, body, and electronics, along with professional consultation, help collectors make informed purchasing decisions. Developing a personal risk threshold and disciplined assessment process prevents costly mistakes and builds a valuable collection over time.
You found it. A vintage guitar with beautiful aged sunburst, original tuners, and a price that seems almost too reasonable. You buy it. Three weeks later, a luthier tells you the neck block is separating, the truss rod is frozen, and you’re looking at a repair bill that rivals what you paid for the guitar itself. This scenario plays out more often than seasoned collectors care to admit. Vintage guitars can hide serious issues behind attractive finishes and compelling origin stories. This guide walks you through a systematic, hands-on inspection process designed to protect your investment and sharpen your judgment before any money changes hands.
Table of Contents
- Essential tools and preparation
- Step 1: Evaluate neck straightness and playability
- Step 2: Inspect body condition and structural integrity
- Step 3: Test electronics and hardware functionality
- Verification: Confirm findings and next steps
- A collector’s hard-won lesson: why every inspection is personal
- Ready to make informed vintage guitar purchases?
- Frequently asked questions
Key Takeaways
| Point | Details |
|---|---|
| Preparation matters | Using the right tools and working in stable conditions ensures accurate inspection results. |
| Check neck mechanics | Evaluate neck straightness, relief, and truss rod function beyond what photos reveal. |
| Inspect structure | Distinguish between normal wear and problematic cracks, especially in the neck and joints. |
| Test functionality | Thoroughly verify electronics and hardware to avoid costly surprises. |
| Verify and act | Combine findings to decide on negotiation, professional assessment, or walking away. |
Essential tools and preparation
Now that you know why inspection matters, let’s start with getting properly equipped for the process.
Walking into a guitar assessment without the right tools is like reading a map in the dark. You can guess, but you’ll miss what matters. Before you touch a single instrument, assemble the following:
- Flashlight (slim penlight preferred for looking inside the body)
- Straightedge (a metal ruler works well)
- Feeler gauge or a standard credit card for measuring neck relief
- Clip-on tuner to verify pitch and tuning stability
- Notepad and pen for recording observations
- Small mirror for inspecting braces and interior joints
- Smartphone for photographing each stage
This isn’t an overcomplicated kit. Every item serves a specific purpose, and you’ll use all of them if you’re doing the job right.
Environment matters just as much as the tools themselves. Humidity and seasonal moisture changes can alter neck relief and action, which means what you observe during an inspection can shift dramatically depending on the conditions. Assess a guitar in a climate-stable room, ideally around 45 to 55 percent relative humidity and room temperature (68 to 72°F). Don’t inspect a cold guitar that’s just been brought in from a van or a damp case. Give it time to acclimate.
Pro Tip: Photograph every step of your inspection. Date and label each image. When you’re comparing multiple instruments, or if a dispute arises later, those photos become your most reliable record. They also help you spot things you may have missed in person when you review them on a larger screen later.
Before diving into the physical assessment, review our vintage buying checklist to make sure your preparation covers all the bases specific to vintage instruments.
| Condition factor | Ideal assessment environment | Why it matters |
|---|---|---|
| Neck relief | 68 to 72°F, 45 to 55% RH | Humidity shifts change neck bow |
| Body finish | Good natural lighting | Reveals checking, cracks, repairs |
| Electronics | Functional power source nearby | Allows real-time testing |
| Fret wear | Direct focused light | Shows crowning and pitting clearly |
Step 1: Evaluate neck straightness and playability
With tools in hand and environment set, focus your assessment at the core of playability: the neck.
Mechanics checks should include neck straightness, truss rod status, and action and relief measurements rather than relying only on photographs. Photos simply cannot capture the three-dimensional reality of a warped or back-bowed neck.
Follow these steps in order:
- Sight down the neck from the headstock toward the body. Look for any deviation from a straight, even plane. A slight forward bow (concave) is normal and expected.
- Place a straightedge along the frets from the first fret to the 12th or 14th fret. The straightedge should rest evenly across the fret tops. Any rocking or gap reveals relief or hump.
- Measure the relief by fretting the low E string at both the first fret and the last fret simultaneously. Check the gap at the 7th or 8th fret using a feeler gauge or the edge of a credit card. A gap around 0.010 inches (0.25mm) is generally acceptable for most vintage guitars.
- Test the truss rod if the guitar has one. Carefully attempt a small adjustment (no more than a quarter turn) to confirm it moves freely. A frozen truss rod is a significant issue.
- Check action height at the first and 12th frets. Excessively high action can indicate a warped neck or an improperly set saddle.
- Look for twist by sighting down both treble and bass sides separately. One side sitting noticeably higher than the other signals a twisted neck, which is far harder to correct than simple relief issues.
“Relief too high makes the guitar hard to play; relief too low causes fret buzz throughout the neck. Either extreme tells you something important about the guitar’s setup history and structural condition.”
Pro Tip: Understand the difference between neck relief and a warp or twist before you start. Relief is an intentional, adjustable curve used to accommodate string vibration. A warp or twist is a permanent deformation in the wood and is a far more serious problem. Adjust your offer price or walk away accordingly. Our guitar neck evaluation guide goes deeper on recognizing each condition.
Step 2: Inspect body condition and structural integrity
Once you’ve verified the neck, move on to inspecting the backbone of your guitar: its body and joints.
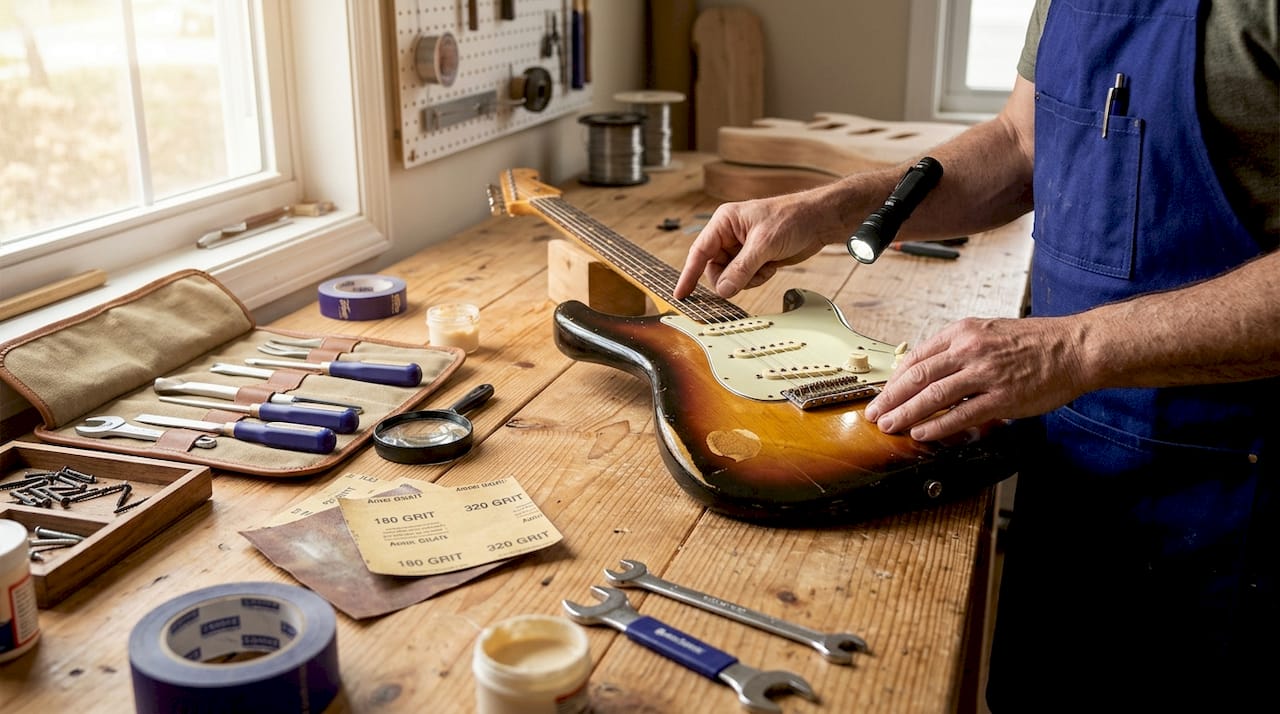
Neck and body joints require careful inspection because structural movement, cracks, and poor reassembly materially impact tone, sustain, and long-term playability. These are not cosmetic concerns.
Focus on these high-priority areas:
- The heel and neck block joint: Push gently forward and back on the neck while watching the joint. Any movement, no matter how small, signals a loose joint that will worsen over time.
- The headstock: Vintage headstock breaks are extremely common and not always obvious after repair. Check for color inconsistency, visible glue lines, and finish mismatches right behind the nut.
- Top cracks near the bridge: The bridge exerts consistent forward pressure on the top. Cracks radiating from the bridge area can indicate stress fractures.
- Around strap buttons and mounting screws: These areas experience repeated mechanical stress and often show early signs of splitting or separation.
- Inside the body: Use your flashlight and mirror to check brace condition. Loose braces rattle audibly when you tap the top, and they kill sustain and resonance.
Structural repairs can reduce collectible value by 30% or more, even when done professionally. Knowing what was repaired and how is essential context before you make an offer.
| Condition | Acceptable | Red flag |
|---|---|---|
| Surface finish | Light lacquer checking, buckle rash | Overspray, complete refinish |
| Top grain | Minor dents, normal playwear | Cracks extending across grain |
| Neck joint | Tight with no movement | Separation, visible shimming |
| Bracing | Fully glued, resonant tap tone | Loose braces, dead spots |
| Back and sides | Small dings, honest aging | Structural cracks, poorly repaired splits |
Evaluating vintage guitar structure in this systematic way prevents the most expensive surprises collectors encounter.
Step 3: Test electronics and hardware functionality
Having established structural fitness, it’s time to ensure everything works as intended. This is especially important for things you simply cannot see in photos.
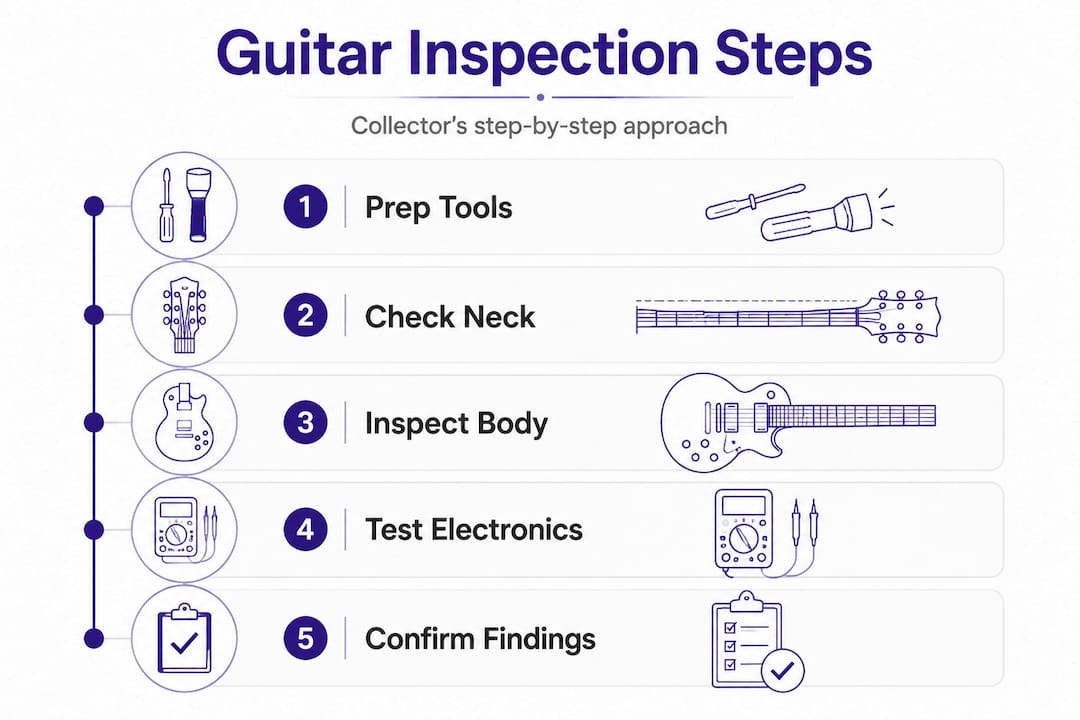
For electric and acoustic-electric guitars, test electronics and verify functional hardware rather than assuming a clean appearance means working condition. Oxidation and intermittent failures hide behind polished covers.
Test hardware in this sequence:
- Tuning machines: Turn each tuner fully and observe whether it moves smoothly and holds position. Slipping or grinding tuners affect tuning stability directly.
- Nut slots: Check string seating. Slots that are too deep cause buzzing at open positions and are a common sign of poor maintenance.
- Bridge and saddle: Look for cracks in bone or synthetic saddles. On electric guitars, check that saddles adjust freely and that the bridge posts are tight in the body.
- Fret condition: Run your thumb across all fret tops and edges. Sharp fret ends indicate drying and shrinkage. Flat or grooved frets need a leveling or replacement.
- Fret wire height: Low frets don’t necessarily need replacement but will limit how long the guitar stays playable without a refret.
For electronics, follow these steps:
- Plug into a small amp (bring your own cable and a battery if the guitar is acoustic-electric).
- Test the output jack by gently wiggling the cable. Crackling or dropouts mean a loose or oxidized jack.
- Roll each volume and tone control slowly through its full range. Static or scratchy response signals dirty or failing potentiometers.
- Switch between pickup positions on electric guitars multiple times. Any dead positions need immediate diagnosis.
- For active pickups or preamps, replace the battery before testing to rule out a false negative.
Key warning signs to note during electronics testing include:
- Visible corrosion on control plates or pickup covers
- Non-original wiring or replaced components (can affect collector value)
- Humming or excessive noise that doesn’t reduce when you touch the strings
- Microphonic feedback at normal playing volume
Pro Tip: Always bring a mini amp or a headphone amp and a fresh 9-volt battery to any hands-on assessment. Sellers often don’t have equipment available, and you can’t properly evaluate a working guitar without hearing it amplified. Our guide on acoustic guitar electronics testing covers preamp systems in greater detail for acoustic-electric instruments.
Repairs to vintage electronics are usually best left to professionals. Tone capacitors, original potentiometers, and factory wiring all contribute to collectible value in ways that amateur soldering can permanently erase.
Verification: Confirm findings and next steps
Now, draw your observations together. What do your findings reveal about the instrument, and what should you do next?
“Small lacquer finish checking can actually enhance vintage appeal and is a normal sign of aging on older instruments. But cracks that run into the wood itself, especially if they appear to be expanding or have irregular edges, signal structural problems that no amount of charm can offset.”
| Finding | Recommended action |
|---|---|
| Minor finish checking | Accept as normal vintage character |
| Frozen truss rod | Request luthier inspection before purchase |
| Loose neck joint | Negotiate significant price reduction or walk away |
| Replaced tuners | Minor negotiation, confirm replacements are quality parts |
| Cracked headstock (repaired) | Request full repair documentation; assess quality |
| Non-original electronics | Verify with seller; factor into value calculation |
| Expanding wood crack | Walk away unless price accounts for full repair cost |
After completing your assessment, work through this post-inspection checklist:
- Separate cosmetic issues from structural ones in your notes.
- Estimate realistic repair costs for each issue you found (get a luthier’s quote if needed).
- Research comparable sales to understand market value at different condition grades.
- Decide what you’re willing to negotiate on versus what would be a dealbreaker.
- Confirm authenticity confirmation steps have been completed, including serial number verification and hardware dating.
- If uncertain about structural findings, always involve a qualified luthier before committing.
Finish checking can be normal aging, but any crack that moves under light finger pressure or shows separation in the wood fibers is a structural red flag that demands professional attention. Don’t let a great-sounding instrument and an eager seller short-circuit your judgment.
A collector’s hard-won lesson: why every inspection is personal
Here’s the uncomfortable truth that no inspection checklist will tell you: the process only works if you’re willing to use it fully, including the part where you walk away.
Every serious collector develops their own threshold for risk and restoration. Some are comfortable buying a guitar that needs a neck reset and a fret level because they know a trusted luthier and understand the cost. Others won’t touch anything with a repaired headstock crack because their focus is pure originality. Neither position is wrong. What matters is that your threshold is thought through and consistent, not reactive to a compelling story or an attractive asking price.
The importance of hands-on assessment goes far beyond checking boxes. It’s about building a personal language for reading guitars. Every instrument you evaluate, even the ones you don’t buy, teaches you something. The guitar with the beautiful burst that turned out to have a poorly shimmed neck joint taught you to push on neck joints. The acoustic that sounded dead in the store but had three unglued braces reinforced the tap-tone test permanently.
Even seasoned collectors miss things. The goal of a disciplined inspection process isn’t perfection. It’s making sure that when you do miss something, it’s a minor finish issue rather than a structural failure. The collectors who get burned repeatedly are usually the ones who let excitement override process. The ones who build great collections are those who apply the same scrutiny to their twentieth instrument that they brought to their first.
One more thing worth naming directly: the one that got away is almost always less painful than the one you wish you’d walked away from. Trust the process.
Ready to make informed vintage guitar purchases?
If you want even more guidance, or are ready to explore authentic vintage guitars, here’s where expert resources help.
At Vintage Guitar World, we’ve built our platform around exactly the kind of informed buying this article describes. Every instrument in our catalog comes with detailed condition documentation, expert evaluation, and full provenance support so you can apply your inspection knowledge to guitars you can trust.

Explore our types of vintage guitars section for model history and investment context that sharpens your assessment perspective. When you need clarity on what a guitar is actually worth given its condition, our guitar valuation advice service gives you data-backed answers from specialists who handle vintage instruments every day. Whether you’re buying your first collectible or refining a serious collection, we’re here to support every step.
Frequently asked questions
How do I tell if a vintage guitar neck is warped or just has relief?
Measure relief at the 7th or 8th fret using a feeler gauge while fretting both ends of the string simultaneously. Uneven relief across the treble and bass sides, or a twist visible when sighting down the neck, usually indicates a warp rather than normal adjustable relief.
What’s the difference between finish checking and a crack?
Finish checking appears as a network of fine surface lines in the lacquer and is a common, accepted sign of aging on vintage instruments. Cracks in the wood itself signal structural problems and run deeper than the finish, often with irregular or separated edges.
Should I buy a guitar with replaced electronics?
Replaced electronics can lower collector value but aren’t always dealbreakers depending on your intent. Electronics repair is best left to professionals, and original components carry significant weight for serious collectors focused on authenticity and resale value.
How important is the neck joint for overall value?
It’s one of the most critical factors. Structural movement or poor reassembly at the neck joint directly impacts tone, sustain, and playability, and a damaged or improperly repaired joint can dramatically reduce both the playability and the collectible value of an instrument.
Do temperature and humidity changes matter during assessment?
Yes, significantly. Humidity and seasonal moisture changes can alter neck relief and action, so an inspection done in unstable environmental conditions may not reflect the guitar’s true setup or structural behavior. Always inspect in a stable, climate-controlled environment when possible.