












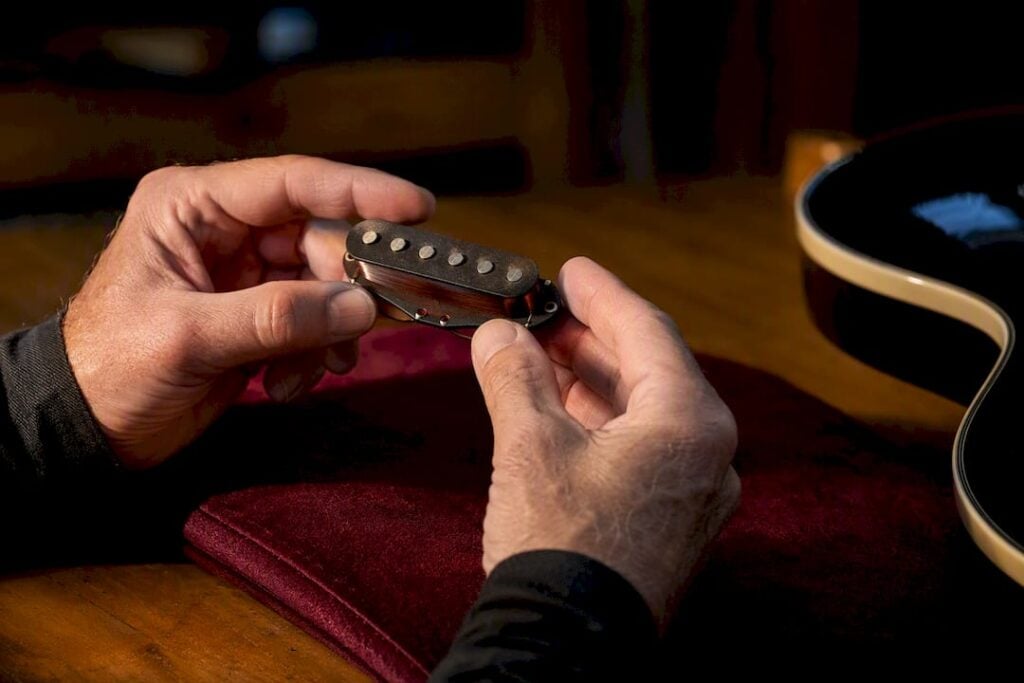

You can usually confirm whether pickups are original with three fast checks: identify the type visually, match the markings against the guitar’s claimed era, and take a DCR reading with a multimeter. If those three tell different stories, stop guessing. Photograph the cover, the baseplate or back, and the wiring cavity, then get a maker or certified appraiser to weigh in before you buy, sell, or insure the instrument.
TL;DR:
- Visual inspection remains the most reliable initial method to identify pickup types, with distinctions based on size, pole piece arrangement, and finish.
- Comparing pickup markings against the guitar’s claimed production era and examining mounting wear patterns can reveal potential replacements or modifications.
- Electrical testing of DC resistance and inductance provides important clues, but no single measurement confirms authenticity without context.
- Authentic vintage pickups show specific features like “Patent Applied For” decals or “T” moldings, which need to be cross-checked with the guitar’s date and model.
- Expert verification is essential for high-value transactions or disputes, requiring comprehensive evidence collection before consulting certified appraisers.
Table of Contents
- Quick Visual Checklist for Identifying Pickup Types
- How to Inspect Pickups Without Removing Strings
- What to Check When the Pickup Is Removed
- Electrical Tests: DCR, Inductance, and Polarity
- Materials and Construction Clues Collectors Rely On
- Dating Pickups: P.A.F., Pat No, and T-Top Timelines
- Signs a Pickup Is Aftermarket, Replaced, or Fake
- When to Get Expert or Manufacturer Verification
- Vintage Guitar World’s Take on Pickup Verification
- Book a Testing Appointment or Certified Appraisal
- Sources
Quick Visual Checklist for Identifying Pickup Types
Before you touch a screwdriver, look. Visual inspection is genuinely the most effective first step, and it’s the one most buyers skip because they’re in a hurry to plug in and hear a solo.
Single-coils are narrow and elongated, with six visible pole pieces running in a single row. P-90s are wider and boxier, still single-row but roughly double the footprint of a Stratocaster-style pickup. Humbuckers are close to twice the width of a single-coil, with two rows of pole pieces (or slugs on one side and screws on the other). Active pickups often give themselves away with a sealed, potted housing and, somewhere on the guitar, a battery compartment for the preamp. These size and layout differences are consistent enough that GuitarHQ’s identification primer treats visual type ID as the starting point for any authentication, before a single measurement gets taken.
Once you know the type, look for things that don’t belong.
- Screws that don’t match each other in finish or head style, especially on a guitar claimed to be all-original.
- A logo decal that looks crisp and modern on hardware that’s otherwise decades old.
- Wear patterns that don’t line up. A body worn smooth from 40 years of gigging shouldn’t sit next to a pickup with pristine, unscuffed pole pieces.
- Cover seams or solder blobs that look fresh compared to the surrounding hardware.
Pro Tip: Shoot photos straight on, not at an angle, and include something for scale, like a ruler or a coin, in the frame. A slightly blurry close-up is far less useful to a forum expert or appraiser than a sharp, well-lit shot from three inches away.
How to Inspect Pickups Without Removing Strings
You can gather a surprising amount of evidence without loosening a single string or backing out a mounting screw, and that matters because unnecessary disassembly is how good guitars pick up bad repair histories.
- Look through the pickguard or f-hole edges. On bolt-on guitars with a pickguard, tilt the guard slightly (never force it) and shine a flashlight into the control cavity. You can often spot wire color, pot brands, and whether shielded cable or braided shield wire was used.
- Check pot codes if visible. Potentiometers are usually date-stamped. A guitar claiming a 1962 build date with pots stamped from 2004 is telling you something important.
- Examine mounting method and screw spacing. Pickups routed directly into the body versus mounted on a pickguard leave different wear signatures. Uneven screw spacing or filled screw holes suggest a pickup swap at some point.
- Note capacitor type. Vintage-era caps often look visibly different from modern ceramic or film caps. This isn’t proof on its own, but it’s a data point.
Go slowly, and if strings are in the way, loosen rather than remove them entirely. Never pry at a pickguard edge with metal tools. A cracked 60-year-old nitrocellulose finish turns a $3,000 problem into a $300 instrument in about two seconds.
What to Check When the Pickup Is Removed
Flipping a pickup over gives you the clearest evidence you’ll get without lab equipment, which is exactly why serious buyers insist on it before a high-dollar sale closes.
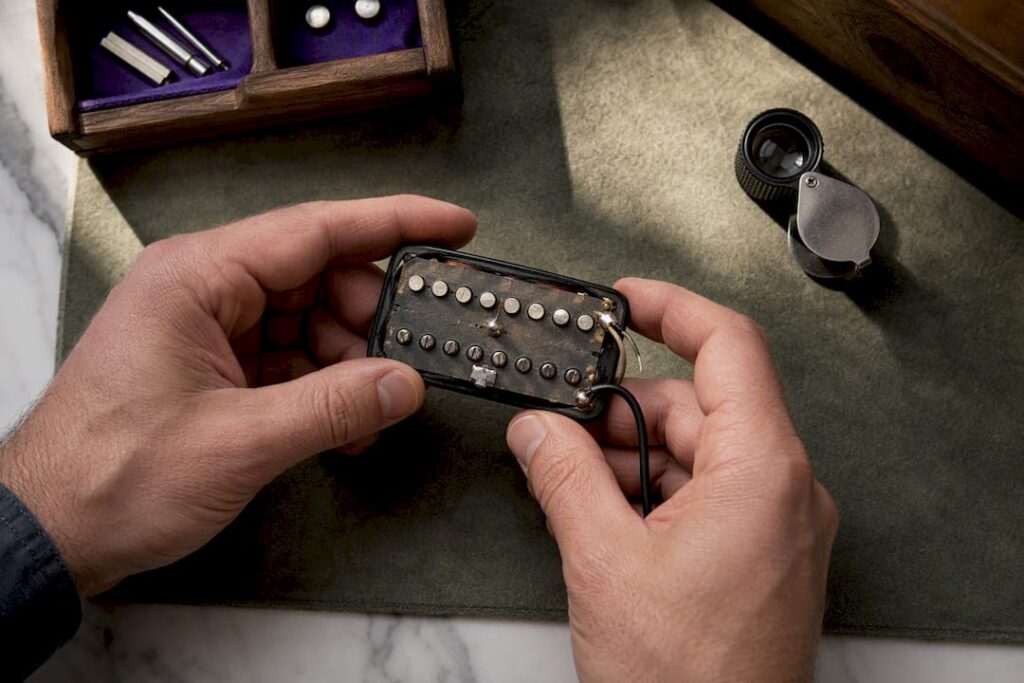
Start with the baseplate. For vintage Gibson humbuckers built between 1957 and 1961, you’re looking for a small paper decal reading “Patent Applied For,” which collectors shorten to P.A.F. Later baseplates carry a stamped patent number instead, and from 1967 onward Gibson shifted to the T-Top design, identifiable by the letter “T” molded into the bobbin. According to Wikipedia’s overview of P.A.F. pickups, matching these markings against the guitar’s actual production year is one of the most reliable single steps in the whole process, though it’s not proof by itself.
Beyond the decal, check these details:
- Bobbin material and color. Older bobbins tend to be a specific shade of butterscotch or cream plastic; modern replacement bobbins often run slightly whiter or more uniform.
- Wire insulation color on the leads. Cloth-covered or era-correct colored insulation is a strong clue; bright, uniformly colored modern hookup wire on a “vintage” pickup is a flag.
- Solder joints. Old solder tends to look duller and slightly grayer; fresh joints are shinier and often bulkier.
- Braided shield wire versus modern insulated shielded cable, which became more common in later production runs.
A single mismatched detail doesn’t disqualify a pickup. Bobbins occasionally got swapped during a factory-authorized repair decades ago, and that doesn’t make the coil itself fake. The mistake collectors make most often is treating one clue as a verdict rather than one data point among several. Gombrelli Guitars’ identification checklist makes the same point about Fender-era pickups: cross-check against model-specific catalog specs rather than relying on any single stamp or color.
Electrical Tests: DCR, Inductance, and Polarity
Visual clues get you most of the way there. A meter gets you the rest.
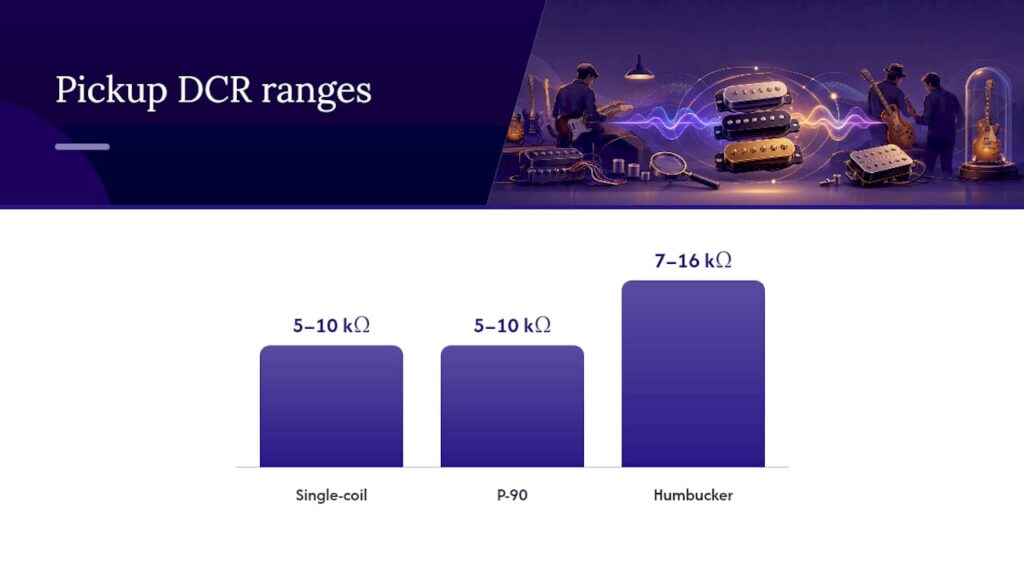
- Measure DC resistance (DCR). Set a multimeter to ohms and touch the probes to the pickup’s hot and ground leads. Single-coils typically read somewhere in the 5 to 10 kilohm range depending on the era and model, while humbuckers commonly land between 7 and 16 kilohms. P-90s usually sit in a comparable range to a hot single-coil. These are typical bands, not hard rules; a reading well outside them, especially far higher, often points to a rewind rather than an original coil.
- Check inductance if you have access to an LCR meter. This measures resonant peak behavior and gives a more complete tonal fingerprint than DCR alone. A pickup with correct DCR but wildly mismatched inductance is worth a second look.
- Test polarity and phase. Tap each pickup with a small screwdriver while metering AC voltage, or use a polarity-checking magnet, to confirm the coils are wired the way the manufacturer intended, especially important for verifying humbucker coil-splitting wiring.
- Listen critically. Plug in and A/B against a known-original example if you can. A pickup claiming vintage Alnico magnets should sound warmer and slightly less aggressive up top than a ceramic-loaded modern equivalent.
Pro Tip: Write every reading down the moment you take it, with the meter model and probe placement noted. A DCR number without context is nearly useless to an appraiser three weeks later when you can’t remember which lead was ground.
Explanations of why single-coils, P-90s, and humbuckers measure and sound different come down to coil geometry and magnetic field shape, a distinction covered well in Wikipedia’s general pickup overview.
Materials and Construction Clues Collectors Rely On
Magnets get too much credit in most authenticity debates. They’re one variable among several, not a verdict on their own.
Alnico II, III, IV, and V magnets each behave a little differently. Alnico II tends to sound softer and more vintage-voiced; Alnico V is punchier and more common in later or hotter-wound pickups. Ceramic magnets, by contrast, are a strong signal of a modern replacement or aftermarket upgrade, since they were rarely factory-standard in the vintage humbuckers and single-coils collectors chase.
- Winding wire gauge and enamel color shift by era. Older machine-wound coils often show slightly irregular wind patterns compared to today’s tightly controlled CNC winding.
- Bobbin and cover materials changed over decades, and wax potting (dipping the coil in wax to reduce microphonic squeal) was applied inconsistently even within the same factory era, so its presence or absence isn’t a clean yes/no test.
- Braided versus foil shielding, discussed in the removal section above, ties back into this same materials story.
A study on pickup magnet and winding interaction makes the case plainly: tone and identity emerge from magnet alloy, wire gauge, winding count, and resonant frequency acting together, not from any one ingredient. That’s the same reasoning Gearnews’ pickup primer walks through when explaining why a magnet swap alone doesn’t turn a pickup into something else, and why appraisers weigh several construction factors before signing off on originality.
Dating Pickups: P.A.F., Pat No, and T-Top Timelines
Three labels do most of the heavy lifting when you’re dating a Gibson-style humbucker, and getting the sequence right prevents a lot of costly mistakes.
- P.A.F. (Patent Applied For): used on baseplates roughly from 1957 to 1961, before Gibson’s patent was formally granted.
- Pat No: a stamped patent number replacing the paper decal once the patent came through, used through most of the 1960s.
- T-Top: a bobbin design change appearing from 1967 onward, identifiable by a molded “T” on the bobbin itself.
These transitions are reliable dating tools, but only when you cross-check them against catalog specs and documented model years rather than treating a single stamp as final proof, a point Wikipedia’s P.A.F. entry makes directly. Guitar World’s history of the P-90 and humbucker adds useful context here too, since knowing roughly when P-90s gave way to humbuckers in specific Gibson models helps you spot a pickup that’s the wrong type for the guitar’s stated year, not just the wrong stamp.
Signs a Pickup Is Aftermarket, Replaced, or Fake
Some giveaways are obvious once you know to look for them. Others take a magnifying glass.
- Wear mismatch: a pickup that looks brand new sitting in a guitar with 50 years of belt-buckle scarring on the back.
- Modern screws, fresh drill marks in the routing, or filled and re-drilled mounting holes.
- Wiring colors that don’t match the era, or insulated modern wire where braided shield should be.
- Perfectly crisp printed logos or part numbers on hardware that’s otherwise aged and oxidized.
- Magnet finishes that look too clean, too uniform, or the wrong alloy color for the claimed era.
Good reproductions can nail most of the obvious stuff. What they often miss is subtler: the exact enamel color of the winding wire, the specific solder alloy used at the factory, or the winding tension variability that comes from decades-old machinery rather than a modern CNC winder. That’s the level of detail serious collectors and dealers check when a large sum of money is on the line, and it’s exactly why disputes sometimes end up needing lab-level material analysis rather than a visual once-over.
When to Get Expert or Manufacturer Verification
DIY checks take you far. They don’t take you all the way, especially once real money is involved.
- Get expert verification when the stakes are high. A five-figure vintage guitar sale, an insurance claim, or a dispute between buyer and seller all justify paid authentication.
- Gather your evidence first. Collect your photo set (cover, baseplate, wiring cavity, any stamps), your DCR and inductance readings, and any provenance documents like original receipts or prior appraisals.
- Reach out to the right party. That might be a certified vintage guitar appraiser, a reputable specialist dealer, or in some cases the original manufacturer’s archive team.
- Expect a process, not an instant answer. Reliable authentication takes time and often involves cross-referencing serial numbers, catalog specs, and physical inspection, so factor that into any sale timeline. A guitar valuation guide walks through what that documentation process typically looks like.
Vintage Guitar World’s Take on Pickup Verification
We’ve watched pickup provenance swing a valuation by thousands of dollars, and the pattern is always the same: buyers who trust one clue get burned, and buyers who stack visual, electrical, and historical evidence rarely do. A DCR reading that contradicts a decal is worth more than either one alone. Our best-practice advice stays simple: run the free checks yourself first, then pay for certified appraisal only when the evidence disagrees or real money is on the table.
— Vintage
Book a Testing Appointment or Certified Appraisal
Some services offer hands-on testing appointments where someone actually measures the pickup instead of guessing from photos. Appraisal services typically check DCR, visual construction markers, and historical documentation together, then deliver a certification useful when selling, insuring, or simply settling your own curiosity.

Before you book, prepare a simple packet: close-up photos of the cover, baseplate, and wiring cavity, plus any DCR or inductance readings you’ve already taken. That packet is exactly what our appraisal checklist walks you through building. If the verification confirms expectations or reveals new information, the result comes with documentation rather than guesswork. Start with the guitar appraisal service and get a real answer instead of another forum thread full of opinions.
Sources
Before your next inspection, line up the right references and gear.
- GuitarHQ — PAF and pickup identification primer
- Gearnews — Tonabnehmer verstehen (pickup primer)
- Gombrelli Guitars — pickup identification checklist