












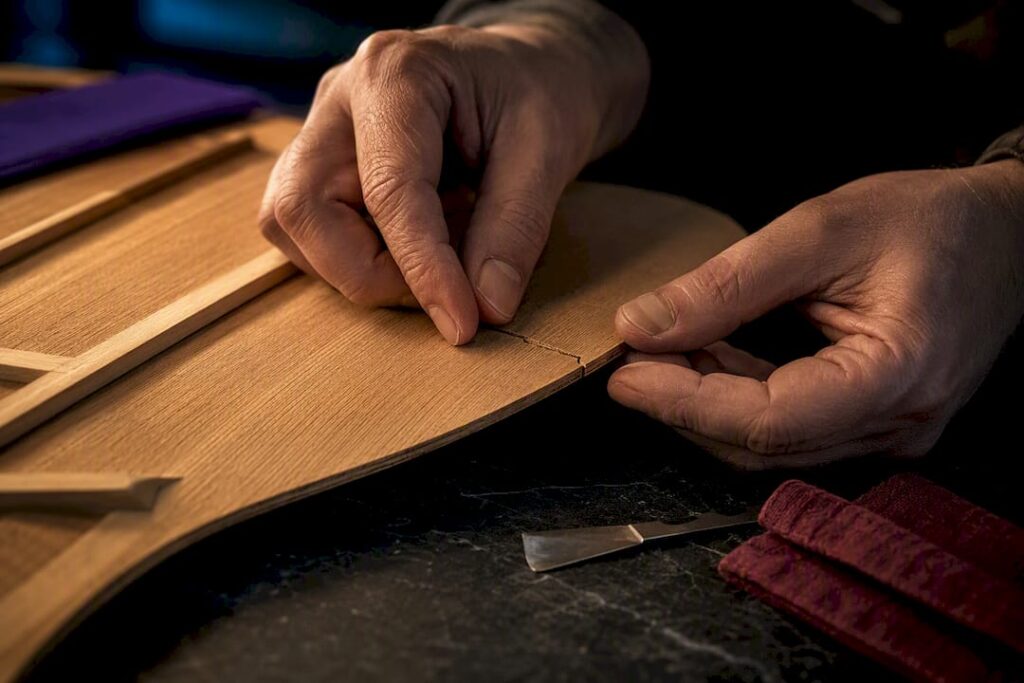

A repaired crack usually lowers a guitar’s resale value, but how much it does depends almost entirely on repair quality and how fast you acted. A clean, professionally documented fix on a side crack might cost you a moderate portion of the market value. A rushed or amateur job near the bridge can cost far more, including tone. Stop playing, photograph the damage, get the instrument into stable humidity, and line up an assessment before you do anything else.
TL;DR:
- A professional repair with documentation and minimal visible signs preserves more value, especially if done away from stress points like the bridge area.
- Addressing cracks within days, especially humidity-related ones, leads to less visible or more repairable damage, whereas delays worsen the situation.
- Repair costs vary significantly from simple cleats to full restorations, with high-value instruments justifying the higher expense to protect collector worth.
- Proper assessment involves careful crack mapping, humidity reconditioning, correct glue choice, and internal cleats to ensure a lasting fix.
- Keeping detailed repair documentation and monitoring humidity levels is crucial for maintaining and proving an instrument’s value over time.
Table of Contents
- Does a Repaired Crack Lower Resale or Collector Value?
- How Professionals Repair Cracks — What Good Repair Looks Like
- When to Act Now and When to Wait
- Repair Cost Ranges and How They Affect Resale
- How to Inspect, Document, and Present a Repaired Guitar
- Preventing New Cracks and Protecting Instrument Value
- Vintage Guitar World Services for Valuation, Testing, and Certified Documentation
- Editorial View: Playability and Preservation Over Cosmetic Perfection
- Get a Professional Read on What Your Repair Is Actually Worth
- Sources
Does a Repaired Crack Lower Resale or Collector Value?
Yes, but not uniformly. A crack in the lacquer alone is cosmetic and rarely touches tone or structural strength. A crack through the wood itself, especially one that reaches a brace, the bridge plate, or the sides, is a different problem entirely and buyers price it that way.
Visibility matters as much as severity. A repair a buyer can spot from three feet away reads as damage. A repair that’s invisible except under raking light, backed by receipts and photos of the internal cleats, reads as maintenance. Luthiers who work on these instruments regularly note that a clean, well-documented repair preserves much of an instrument’s usable value, because buyers stop worrying once they can see exactly what was done and by whom.
Factors that shrink the value hit:
- Professional repair from a luthier rather than a home fix with off-the-shelf glue
- Original receipts, photos, and a written description of materials used
- Original bridge, braces, and finish preserved rather than replaced
- Repair located away from structural stress points
A hairline crack on the lower bout, cleated and finished by a competent shop, might barely register in a sale. A split running into the bridge footprint on the same guitar could knock out a much larger chunk of value, even after a technically perfect repair, simply because buyers associate that zone with the top’s structural integrity.
How Professionals Repair Cracks — What Good Repair Looks Like
A luthier doesn’t reach for glue first. The process follows a sequence, and skipping steps is exactly what separates a repair that holds value from one that doesn’t.
- Assess the crack under raking light to map its full length, depth, and whether it’s crossed a brace or kerfing.
- Try humidity reconditioning first. Many seasonal cracks close partially or fully once the guitar sits in a controlled, humidified environment for a stretch of time, which can reduce or eliminate the need for glue and clamps altogether.
- Dry-fit clamping to confirm the crack edges align cleanly before any adhesive touches the wood.
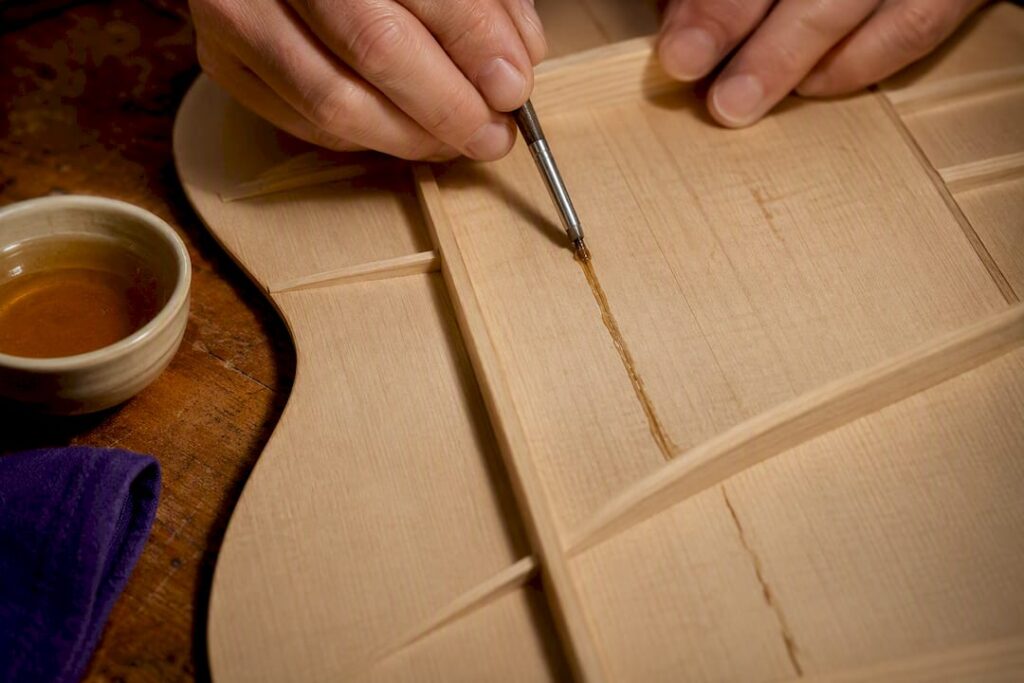
- Choose the right glue. Aliphatic resin glue, sold under names like Titebond, is the standard for most wood-to-wood repairs. Vintage and collectible instruments usually call for hot hide glue instead, because it’s reversible, meaning a future luthier can undo the joint without damaging surrounding wood. Cyanoacrylate (CA) glue has a place, but only on finish, never as a structural fix.
- Clamp with cauls shaped to the guitar’s curve, distributing pressure evenly so the joint closes without denting the surrounding wood.
- Install internal cleats through the soundhole or an access point, small wood patches glued across the crack at roughly a 45 degree angle to the grain, which is the detail that actually keeps the crack from reopening down the road.
- Finish cosmetically last, and only as much as needed. Filling and blending should follow structural stabilization, not precede it.
On high-value or historic instruments, a simple cleat sometimes isn’t enough. A specialist may need to perform a splice, replacing a thin, grain-matched wedge of wood, or even remove the bridge to access a crack underneath. That’s specialist-level work that costs more but protects collector value far better than a visible patch job.
Pro Tip: Ask your luthier which glue they used and keep the answer with your paperwork. “Reversible hide glue” on a 1960s classical is a selling point; “CA glue” on a structural crack is a red flag to any serious buyer.
When to Act Now and When to Wait
Timing changes the outcome more than almost any other factor. A fresh crack, addressed within days, is often invisible once repaired. The same crack left for months collects dirt and body oils in the gap, and the wood can shift further, making a clean repair much harder to achieve without visible seams. This is why waiting almost always makes the job worse, not better.
For a humidity-related crack, some luthiers seal the instrument in a controlled, humidified enclosure for up to two weeks before touching it with any adhesive, letting the wood close on its own. This works well for many seasonal top cracks but has limits. It won’t help a crack that’s mechanical in origin, like an impact fracture.
Get to a specialist immediately if you see:
- A crack running into or near the bridge footprint
- A brace that’s visibly cracked, lifted, or separated from the top
- A gaping split wide enough to see light through
- Any crack accompanied by a buzz, dead spot, or tone change
In the meantime: stop playing the instrument, photograph the damage from multiple angles, get it into a stable 40 to 50 percent relative humidity environment, and contact a luthier rather than experimenting yourself.
Repair Cost Ranges and How They Affect Resale
Repair cost and resale recovery don’t move in lockstep, and knowing where the line sits matters before you spend money.
- Simple glue-and-cleat repair on a small top crack: modest cost, often the best return relative to spend
- Interior cleating with cosmetic touch-up: mid-range cost, still usually worth it on a decent instrument
- Splice or partial restoration near a bridge or brace: significant cost, justified mainly on higher-value or vintage guitars
- Full restoration involving multiple structural repairs: highest cost, and only worth it when the instrument’s collector or historical value clearly exceeds the bill
Cosmetic-only touch-ups, filling a finish ding without any structural work, cost far less than structural repair and barely move resale value on their own, since they don’t address anything a serious buyer is actually worried about. In fact, heavy-handed cosmetic refinishing on a vintage instrument can hurt collector value if it disturbs original lacquer character, so restraint matters as much as skill.
On a low-value student instrument, structural repair costs can exceed what the guitar would fetch repaired. On a rare classical or a well-known vintage flamenco guitar, even an expensive splice repair usually pays for itself in preserved market value, because the alternative, an unrepaired structural crack, tanks the price far more.
How to Inspect, Document, and Present a Repaired Guitar
Buyers and insurers both want proof, not just a verbal assurance that “it was fixed properly.” Build a paper trail before you list or insure the instrument.
- Photograph the crack itself in close-up, then photograph the interior cleats through the soundhole with a flashlight or borescope.
- Capture labels, serial numbers, and wider context shots showing the crack’s location relative to the bridge, braces, and edges.
- Request documentation from the repairer: what glue was used, where cleats were placed, and a dated receipt.
- Describe the repair honestly in any listing. Naming the location, method, and date builds trust and avoids disputes after the sale.
- Get a formal appraisal or certification before selling or insuring, particularly on anything vintage or collectible, using a guitar evaluation checklist as a starting framework.
Preventing New Cracks and Protecting Instrument Value
Prevention costs a fraction of repair, and most luthiers will tell you the best crack repair is the one you never needed. The target range is 40 to 50 percent relative humidity, checked with a basic hygrometer, since stable humidity is the primary defense against seasonal top and back cracks.
- Keep the guitar in its case with a case humidifier during dry months
- Use a room humidifier if you store or play in a space that runs dry
- Check the hygrometer daily during heating season, weekly otherwise
- Avoid rapid swings by letting a guitar acclimate for an hour after travel before opening the case
Pro Tip: A $15 hygrometer catches problems weeks before a crack does. If your reading drops below 35 percent for more than a day or two, that’s your cue to act, not wait. For a deeper walkthrough, see this guide on maintaining optimal humidity.
Vintage Guitar World Services for Valuation, Testing, and Certified Documentation
The website offers valuation, in-person testing appointments, and certification services to provide owners with expert assessments of repaired instruments’ value. A documented, expert appraisal gives a buyer or insurer exactly what they need to trust a repair: clear photos, a written condition report, and a professional’s sign-off.
If you’re weighing whether to sell, insure, or simply understand where your repaired instrument stands, you can arrange an assessment, a hands-on testing appointment, or guidance through a consignment sale.
Editorial View: Playability and Preservation Over Cosmetic Perfection
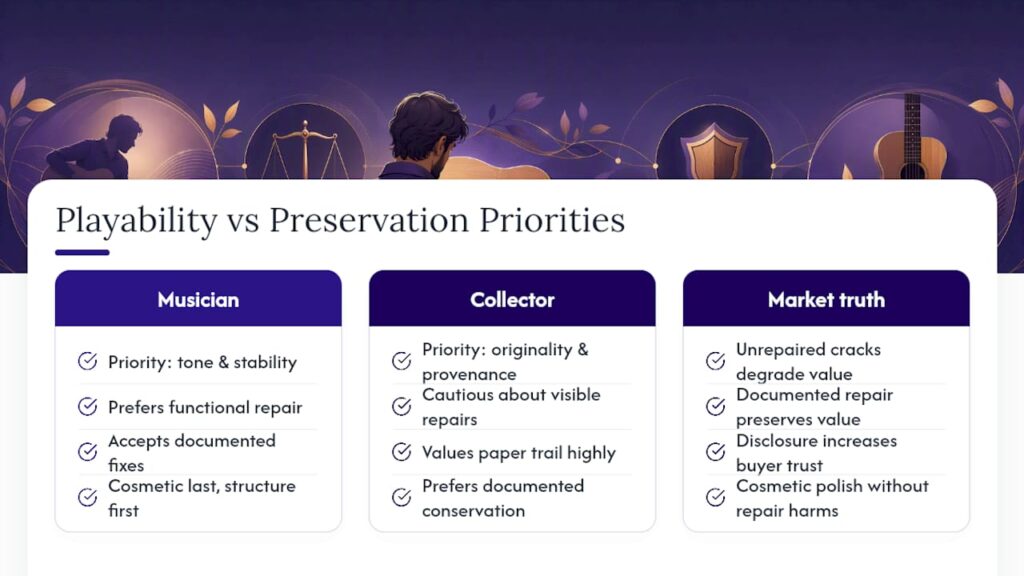
The instinct to hide a repair, or avoid one altogether out of fear it’ll “ruin the value,” usually backfires. An unrepaired structural crack degrades faster and hurts value more than a well-documented fix ever will. Players and collectors weigh this differently: a working musician cares about tone and stability today, while a collector weighs originality and provenance more heavily. Neither group is served by cosmetic polish applied before the structure is sound.
The instruments that hold value best are the ones with an honest paper trail. A repair, disclosed and documented, tells a buyer the guitar was cared for. That’s worth more than pretending the crack never happened.
— Vintage
Get a Professional Read on What Your Repair Is Actually Worth
Guesswork about a repaired crack’s impact on value rarely ends well, whether you’re selling, insuring, or just deciding if further work is worth the cost. Testing appointments and formal valuations are available for owners in this exact situation, providing a written, expert evaluation of instrument condition instead of informal opinions or optimistic seller estimates.

Booking one is simple: reach out through the guitar appraisal service to arrange a testing appointment, bring your repair documentation and photos, and walk away with a certified valuation you can use in a sale listing or an insurance policy. If you’re also curious what a well-preserved, comparable instrument commands on the open market, browse the current collection while you’re at it.
Sources
For deeper technique detail, see Premier Guitar’s breakdown of soundboard crack repair, Chordly’s crack repair guide, and Taylor’s crack and ding repair page. To protect your own instrument going forward, check Vintage-guitar-world’s guide on buying vintage guitars and the authenticity verification guide.
- Acoustic soundboard: When cracks happen – Premier Guitar
- Acoustic guitar crack repair guide — Chordly
- Crack and ding repair — Taylor Guitars