














TL;DR:
- Guitar wear patterns reveal a guitar’s history and identify issues needing professional repair.
- Inspection involves checking fret crowns, ends, and finish wear, especially on frets 1-7.
- Proper maintenance and careful evaluation prevent damage and preserve value in vintage guitars.
A guitar wear pattern is a predictable change in metal or finish caused by repeated contact — strings pressing against frets, hands sliding along the neck, hardware grinding into the body’s back. These aren’t random scratches. They follow the physics of how you play, and once you know what to look for, they tell you almost everything about a guitar’s history and what it needs next.
The bottom line before you read further:
- Urgent problems to spot immediately: deep fret grooves that catch your fingernail, notes that choke or die on bends, fret ends that feel sharp or are visibly lifting from the board. Any of these means the guitar needs a tech before you buy it or play it hard.
- Quick next steps: run a one-minute visual and fingertip inspection, do a brief play test on frets 1–7, then bring the guitar to a qualified luthier if anything feels off.
- When to walk away: a twisted neck, exposed fret tangs, or fret wire so thin that grooves reach the wood underneath. These aren’t negotiating chips — they’re structural problems that cost more to fix than most guitars are worth.
One-minute action check: Hold the guitar under a single light source and tilt it so the light rakes across the frets. Shiny narrow strips on the fret tops? Those are grooves. Run your fingertip slowly across each crown from the first fret to the seventh. Flat spots feel like a plateau instead of a rounded ridge. Play a bend on the 7th fret, B string. If the note chokes or cuts out, you have a wear issue that needs professional attention.
Table of Contents
- What are the different types of guitar wear patterns?
- Where does wear appear most often on a guitar?
- What causes each guitar wear pattern?
- How do you inspect and assess fret wear step by step?
- Repair options: dressing, partial refret, or full refret?
- How to prevent fret wear and protect your guitar’s finish
- What do wear patterns mean when buying a used or vintage guitar?
- What a luthier actually checks that forum posts miss
- Key Takeaways
- How Vintage-guitar-world evaluates wear on every instrument
- Vintage-guitar-world’s services for wear assessment and restoration
- Useful sources and further reading
What are the different types of guitar wear patterns?
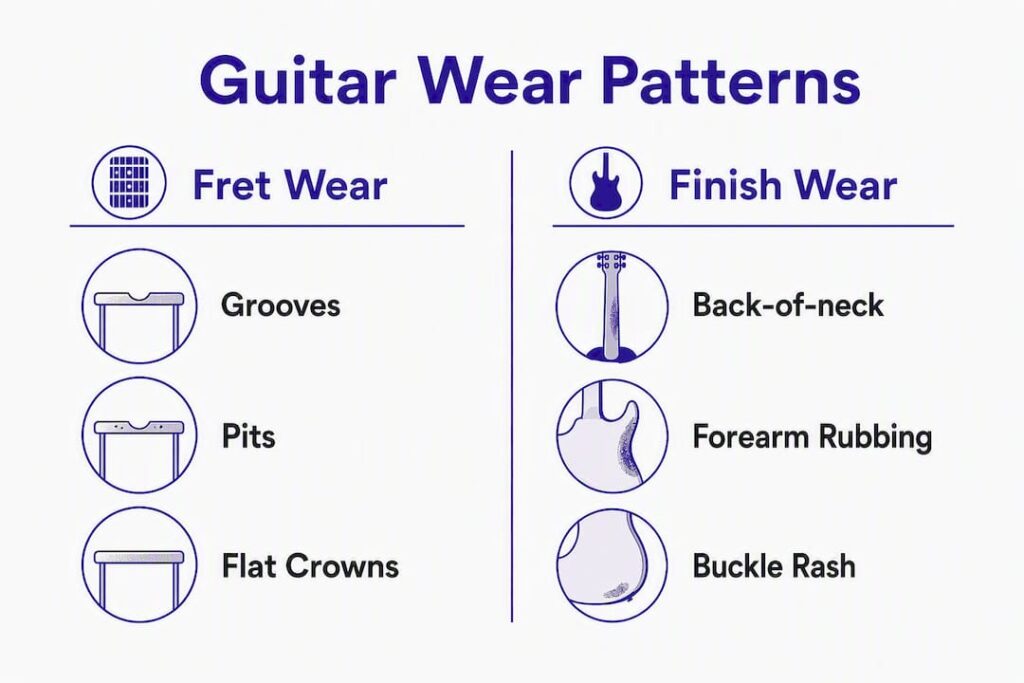
Wear on a guitar falls into two broad categories: fret wear and finish wear. Both are normal over time, but they behave differently and carry different consequences for playability and value.
Fret-top patterns
The most common signs of guitar wear live right on the fret crowns. Under a raking light, worn frets show narrow shiny grooves exactly where each string contacts the metal. Early-stage grooves look like polished lines; later-stage grooves are deep enough to catch a fingernail. As wear progresses, the rounded crown flattens into a plateau, a condition called crown flattening or “fret leveling by accident.” Flat crowns shift the string’s contact point, which throws off intonation and makes bends feel sticky.
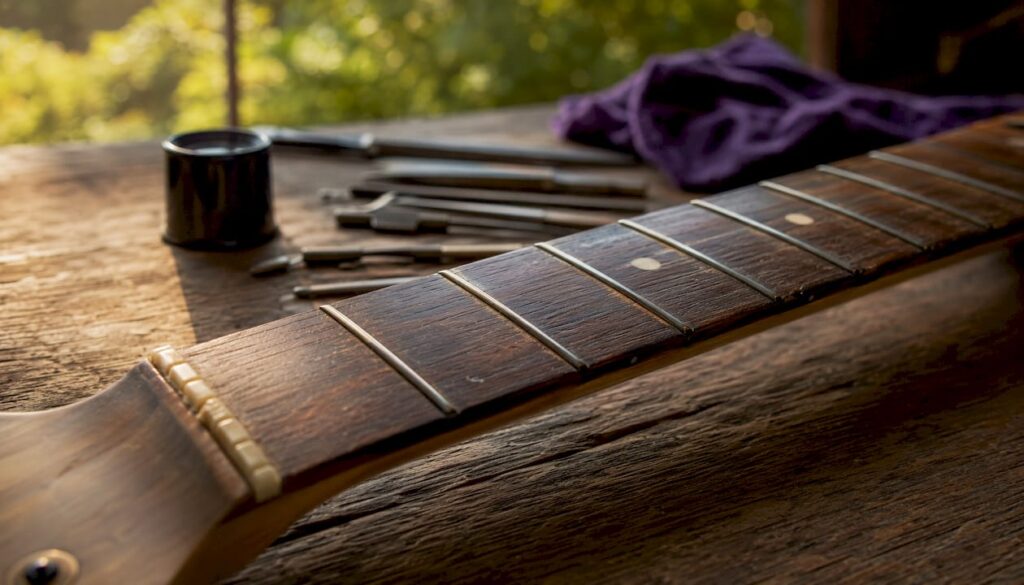
Pits are the next stage. These are small craters or divots, usually clustered under the wound strings (E, A, D) on the lower frets. They form when repeated string impact erodes the fret alloy faster than simple sliding wear. Once pitting is visible, dressing alone may not fully restore the crown geometry. At the extreme end, the crown metal is gone entirely and the fret tang — the barbed metal strip that anchors the fret into the slot — becomes visible or even exposed above the fretboard surface.
Fret-end and tang issues
Sharp fret ends are a separate problem from crown wear, though they often appear together on older instruments. As a guitar’s neck wood dries out and contracts, the fret ends protrude past the fretboard edge, creating a sharp, uncomfortable ridge along the side of the neck. Lifting frets, where the tang has partially pulled free from the slot, cause localized buzzing that a fret rocker will isolate immediately.
Finish and body wear
Back-of-neck finish wear is almost universal on played guitars. The finish rubs off from the palm and thumb, leaving a smooth, sometimes sticky bare-wood patch. Many players actually prefer this feel, so it’s rarely a playability issue, though it matters for collector value.
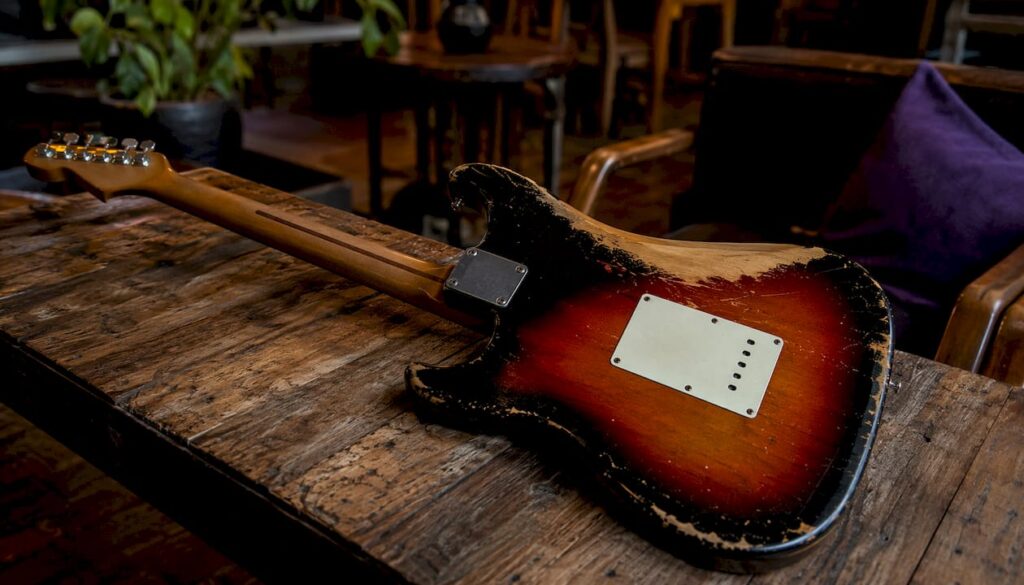
Forearm wear appears on the body’s top edge where the picking arm rests. Belt buckle rash (also called strap button wear) shows up on the back as a cluster of scratches and gouges from metal hardware on clothing. Genuine belt buckle rash follows a predictable oval pattern centered where a buckle would sit; random deep scratches elsewhere suggest mishandling rather than normal play. This distinction matters when evaluating authentic patina versus damage on a vintage instrument.
Where does wear appear most often on a guitar?
Wear concentrates wherever contact is highest and most repetitive. Knowing the hot spots saves inspection time.
Fret hot zones:
- Frets 1–7 take the most abuse on almost every guitar. This is where open chords, power chords, and most rhythm playing happen. Fret wear concentrates in this range, with frets 2, 3, and 5 often the worst on standard-tuned instruments.
- The B and high-E strings typically show deeper grooves than wound strings, because plain steel strings are harder and concentrate more pressure per unit area.
- Frets 7–12 wear faster on lead players who bend and use vibrato in the middle register.
Body hot zones:
- Forearm contour (top edge, treble side): constant friction from the picking arm.
- Below the pick hand on the body top: pick strokes and palm muting leave finish wear and sometimes light scratches.
- Behind the bridge: the picking hand’s heel rests here during palm muting.
- Around strap buttons and the lower bout back: belt hardware contact, as noted in relic guides that map authentic wear locations.
How playing style shifts the map:
- Heavy benders and vibrato players accelerate wear on frets 7–10, particularly under the G and B strings.
- Capo users concentrate wear at whatever fret the capo sits most often; the pressure a capo exerts is similar to a hard press across all strings simultaneously.
- Palm muters wear the body finish behind the bridge faster than players who pick freely.
- Classical and fingerstyle players often show almost no pick-hand body wear but significant fret wear on the treble strings in the first position.
What causes each guitar wear pattern?
Understanding the mechanics helps you predict how fast wear will progress and whether a repair will hold.
String contact and metal fatigue
Every time you fret a note, the string presses into the fret crown under tension. The contact is not static — the string vibrates, slides slightly during bends, and the winding on wound strings acts almost like a file against the fret alloy. Research on play-wear in steel strings confirms that stick-slip abrasion is the dominant wear mechanism: the string alternately grips and releases the fret surface, progressively removing material. Higher-pitched strings, which vibrate at higher frequencies, tend to produce more intense wear at their contact points.
String condition matters more than most players realize. String oxidation and work-hardening change the wire’s stiffness and linear density over time, which alters how the string contacts the fret. Old, corroded strings don’t just sound dull — they can accelerate fret wear and produce intonation problems that mimic fret damage.
Setup factors that concentrate wear
A guitar with too-low action forces strings to contact frets they shouldn’t touch at all, creating wear on frets that would otherwise stay clean. Insufficient neck relief (a neck that’s too straight or back-bowed) has the same effect. Uneven frets — where one fret sits slightly higher than its neighbors — concentrate all the string contact on that high fret, wearing it dramatically faster than the surrounding ones.
Finish abrasion causes
Sweat chemistry is the underappreciated villain of finish wear. Acidic perspiration attacks nitrocellulose lacquer faster than polyester or polyurethane finishes. This is why vintage guitars with nitro finishes often show more pronounced neck and body wear than modern instruments with thick poly coatings. Belt hardware causes finish damage through direct mechanical abrasion; preventative measures like covering buckles or positioning the guitar above the belt line are inexpensive and genuinely effective.
String material and wear rates
| String Type | Fret Wear Rate | Notes |
|---|---|---|
| Nickel-plated steel | Moderate | Most common; balanced wear on frets |
| Pure nickel | Lower | Softer alloy, gentler on frets, warmer tone |
| Stainless steel | Lower on frets | Harder string, but frets last longer overall |
| Coated strings | Lower | Coating reduces friction and corrosion |
| Uncoated plain steel | Higher | No protection; oxidizes and work-hardens faster |
Pro Tip: Switch to coated strings if you play daily and notice fret wear accelerating. The coating reduces friction at the string-fret contact point and slows corrosion, which means both your strings and your frets last longer between service intervals.
How do you inspect and assess fret wear step by step?
A thorough inspection takes about ten minutes and requires no specialized tools for the initial pass. Here’s the workflow luthiers use, simplified for players and buyers.
-
Set up proper lighting. Hold the guitar under a single bright light source (a desk lamp or phone flashlight works) and tilt the neck so the light rakes along the fret tops at a low angle. This side-lighting makes grooves, flat spots, and high/low frets immediately visible as shadows and bright reflections.
-
Sight down the neck. Look from the headstock toward the body along the bass side of the neck. The frets should form a smooth, even arc. Any fret that appears higher or lower than its neighbors is a candidate for buzzing and localized wear.
-
Run a fingertip across the crowns. Starting at the first fret, drag your fingertip slowly across each crown toward the body. A healthy fret feels like a smooth, rounded ridge. Flat spots feel like a plateau. Grooves catch your nail. Sharp fret ends along the neck edge mean the wood has dried and contracted.
-
Coin-rock test for high frets. Lay a coin flat across three adjacent frets. Rock it gently. If it tilts, the middle fret is high; if it rocks the other way, the middle fret is low. A fret rocker does this more precisely, but a coin catches obvious problems. This test prevents you from confusing a single high fret (fixable with spot dressing) with global neck relief issues.
-
Play the common fret zones. Fret each string at positions 1 through 7 and listen for buzzing or dead notes. Then bend the B string at the 7th fret up a whole step and hold it. A note that chokes or cuts out indicates a worn fret ahead of the bend point that the string is catching on.
-
Check intonation. Play the open string, then the 12th-fret harmonic, then the fretted 12th. All three should be the same pitch. If the fretted note is sharp relative to the harmonic, the fret’s contact point has shifted forward due to groove wear. String oxidation can mimic this problem, so swap to a fresh set of strings first before concluding the frets are the cause.
-
Document what you find. Photograph each worn fret under raking light. Note which frets buzz, which strings are affected, and whether the problem is consistent across all strings or isolated. This documentation is useful for getting repair quotes and for negotiating price on a used instrument.
Interpreting results:
- Shiny grooves with no buzzing = surface wear, likely dressable.
- Flat crowns with occasional buzz = moderate wear, dress or targeted replacement.
- Deep grooves, consistent buzz, or choking bends = significant wear, partial or full refret likely needed.
- Exposed fret tangs or frets that move when pressed = full refret required, no exceptions.
Repair options: dressing, partial refret, or full refret?
Choosing the right repair depends on how much fret metal remains, whether the wear is localized or spread across the board, and what the guitar is worth — financially and historically.
| Repair method | Typical cost range | Time required | Impact on tone/playability | Suitability for vintage |
|---|---|---|---|---|
| Fret dressing (level, crown, polish) | $100–$200 | 1–3 hours | Restores playability; minimal tonal change | Excellent — preserves original frets |
| Partial refret (replace worst frets) | $200–$400 | 3–5 hours | Good improvement; slight tonal variation at replaced frets | Acceptable if done carefully |
| Full refret | $300–$600 | 5–10 hours | Best playability restoration; new fret feel throughout | Use only when necessary; affects originality |
Cost ranges reflect typical U.S. shop rates and vary by region, fret wire type, and instrument complexity.
Fret dressing is the right call when grooves are shallow, the crowns are only slightly flat, and there’s enough fret height remaining after leveling. A skilled tech removes the minimum material needed, re-crowns each fret to restore the rounded profile, and polishes them to a mirror finish. The result feels like a new guitar. The original fret wire stays in place, which matters enormously for vintage instruments where originality affects collector value.
Partial refret makes sense when a handful of frets are deeply grooved or pitted while the rest are still serviceable. The tech pulls only the damaged frets, installs new wire, levels the whole board, and re-crowns everything together. The slight tonal difference between old and new fret wire is usually imperceptible in practice.
Full refret is the nuclear option — appropriate when fret wire is worn to the tang, when alloy fatigue makes the metal crumbly or pitted throughout, or when the guitar has been dressed so many times that there’s simply no height left. For a vintage instrument, a full refret is a significant event that should be documented and, ideally, performed with period-correct fret wire to preserve as much originality as possible. According to repair decision guidance, crowns that are completely gone or exposed tangs are the clear threshold for a full refret.
One critical step before booking any fret work: swap in a fresh set of strings and do a basic setup check. Luthiers consistently report that fresh strings restore tone and intonation in ways that reveal whether the real problem is the strings or the frets. It’s a $10–$15 diagnostic step that can save you $200.
How to prevent fret wear and protect your guitar’s finish
Prevention is mostly habit. None of these steps are complicated, but the ones players skip most often are the ones that matter most.
Routine maintenance habits:
- Wash your hands before playing. Sweat and skin oils accelerate both string corrosion and finish wear.
- Wipe down strings after every session with a clean, dry cloth. This alone can double string life and reduce the abrasive debris that accelerates fret wear.
- Change strings regularly. Corroded, work-hardened strings are harder on frets than fresh ones.
- Keep humidity stable (45–55% relative humidity for most guitars). Dry conditions cause neck wood to contract, which makes fret ends sharp and can loosen fret tangs.
- Schedule a professional setup once a year, or whenever the action feels off. Correct action and neck relief prevent strings from contacting frets they shouldn’t, which reduces localized wear. A good acoustic guitar maintenance routine covers all of these.
Equipment and material choices:
- Coated strings (such as Elixir or D’Addario XS) reduce friction at the fret contact point and resist corrosion significantly longer than uncoated strings.
- Lighter gauges reduce the pressure each string exerts on the fret crown, slowing groove formation. The tradeoff is slightly less volume and sustain.
- Pure nickel strings are gentler on frets than stainless steel strings, though stainless strings are harder and wear more slowly themselves.
- For body finish protection, use a strap that positions the guitar above your belt buckle, or cover the buckle with a leather pad. Polyester and polyurethane finishes resist belt rash better than nitrocellulose lacquer, but no finish is immune to direct metal contact.
Setup choices that reduce localized wear:
- Set action at the manufacturer’s recommended height, not lower. Ultra-low action feels fast but forces strings to contact frets they shouldn’t.
- Correct neck relief (a slight forward bow) keeps strings from buzzing on the middle frets and distributes contact more evenly.
- A properly cut nut and saddle prevent the string from binding and releasing abruptly, which reduces the stick-slip wear at the first few frets.
Pro Tip: On a vintage guitar, resist the temptation to lower the action for maximum playability. A slightly higher action protects the original frets and reduces the chance you’ll need a refret that compromises the instrument’s originality and value. The playability tradeoff is usually minor; the value preservation is not.
What do wear patterns mean when buying a used or vintage guitar?
Wear is not automatically a problem. On a vintage guitar, honest play wear is part of the story. The question is whether the wear is manageable, cosmetic, or a structural red flag that should change the price significantly.
Buyer inspection checklist
Before committing to any used guitar, run through these steps:
- Sight down the neck for twist or severe back-bow (neither is fixable cheaply).
- Check frets 1–7 under raking light for grooves and flat crowns.
- Run a fingertip along the fret ends for sharpness.
- Play bends on frets 5, 7, and 9 and listen for choking.
- Ask the seller directly: has the guitar had a refret? When was the last setup? Is there documentation?
- Factor in a repair quote before agreeing to a price.
Red flags that should lower the price significantly
- Fret wire worn to the tang, or frets that move when pressed.
- A twisted neck (hold the guitar at arm’s length and sight from the body end; the fretboard should look flat, not twisted like a propeller).
- Finish damage that suggests impact or abuse rather than play wear (deep dents near the headstock, cracked binding, finish checking that doesn’t follow normal wear paths).
- Belt buckle rash so deep it has cut through the finish into the wood.
When wear is acceptable or even desirable
Light fret wear, back-of-neck finish wear, and forearm rub on the body top are all signs of a played instrument. On a pre-CBS Fender or a vintage Martin, this kind of wear is expected and doesn’t reduce value for most collectors. Genuine guitar patina — the accumulated evidence of decades of real use — can actually enhance a vintage instrument’s appeal and authenticity.
The distinction between authentic wear and artificial relicing matters here. Real wear follows predictable contact patterns: edges thin first, fret grooves concentrate under the strings, belt rash appears in the buckle zone. Random deep scratches in non-contact areas, or wear that looks too uniform, suggest artificial aging rather than honest use.
Using repair quotes to negotiate
Get a written estimate from a luthier before finalizing a purchase. A fret dress that costs $100 is a reasonable ask for a $500 guitar; a $400 full refret on a $600 instrument changes the math entirely. A professional guitar appraisal documents the wear, estimates repair costs, and gives you a defensible number to bring to the negotiating table.
What a luthier actually checks that forum posts miss
Most online advice about fret wear focuses on what you can see. Experienced technicians prioritize what the guitar’s structure tells them, because cosmetic wear is fixable and structural problems often aren’t.
This is the core luthier principle: neck straightness, truss rod function, and the absence of twist or hump are the non-negotiable foundations. Everything else is maintenance.
Expert evaluation checklist
- Truss rod function: turn the adjustment nut a quarter turn in each direction. It should move smoothly with resistance. A rod that spins freely or won’t move at all is a serious problem.
- Fret height thresholds: a fret rocker isolates individual high frets from global relief issues. Use it before recommending any refret. StewMac’s diagnostic guidance emphasizes this step specifically to prevent unnecessary full refrets.
- Alloy fatigue signs: press firmly on each fret crown. Fatigued fret wire feels soft or crumbly; healthy wire feels solid. Pitting that goes deep into the crown rather than sitting on the surface suggests alloy breakdown.
- Localized buzzing diagnostics: buzz that appears only on one fret and one string points to a single high or worn fret. Buzz across multiple frets on multiple strings points to relief or action issues.
- Photographic documentation: photograph each worn fret under raking light, with a ruler for scale. This creates a before record that’s useful for insurance, resale, and verifying that a claimed repair was actually done.
What a proper dress or refret accomplishes
A well-executed fret dress removes the minimum material needed to level the crowns, then re-crowns each fret to restore its rounded profile. The result is consistent string contact across the board, which improves intonation accuracy and eliminates buzzing. Players often describe a dressed guitar as feeling “faster” because the strings seat more predictably on the fret.
A full refret goes further: new fret wire can be chosen in a different alloy or profile than the original, which changes the feel and, subtly, the tone. Stainless steel frets last dramatically longer than nickel-silver but feel harder under the fingers and can sound slightly brighter. For a vintage instrument, matching the original fret wire profile and alloy is worth the extra cost.
Key Takeaways
Guitar wear patterns are predictable, diagnosable, and almost always manageable — the critical skill is distinguishing surface wear from structural damage before you play, buy, or repair.
| Point | Details |
|---|---|
| Fret wear concentrates on frets 1–7 | Grooves, flat crowns, and pits appear first in this zone; inspect here before anywhere else. |
| Fresh strings before any diagnosis | Swap strings first — corroded strings mimic fret and intonation problems and cost far less to fix. |
| Dress vs. refret threshold | Shallow grooves and slight flat spots = dress; deep grooves, dead notes, or exposed tangs = partial or full refret. |
| Neck health beats fret condition | A straight neck with heavy fret wear is repairable; a twisted neck with light wear is a structural problem. |
| Vintage-guitar-world evaluation | Vintage-guitar-world’s appraisal and testing appointments document wear, estimate repair costs, and support price negotiation on vintage instruments. |
How Vintage-guitar-world evaluates wear on every instrument
When Vintage-guitar-world assesses a guitar for purchase, restoration, or sale, the evaluation follows the same priority order a skilled luthier uses: structure first, fret condition second, cosmetic wear last. A neck with a dead truss rod is a pass regardless of how clean the frets look. A guitar with heavy fret wear and a healthy neck is a restoration candidate.
The approach to restoration is deliberately conservative. Original frets are preserved whenever dressing is technically viable. When a refret is unavoidable, period-correct fret wire is sourced to maintain the instrument’s character. Finish wear that represents honest play history is documented and disclosed rather than disguised. Every instrument that passes through the evaluation process receives written documentation of its condition, including photographs of any wear, which becomes part of the instrument’s record and supports transparent pricing.
Vintage-guitar-world’s services for wear assessment and restoration
Wear patterns on a guitar you own or plan to buy deserve a professional opinion, not just a forum thread. Vintage-guitar-world offers guitar testing appointments where you can bring an instrument in for a hands-on evaluation before committing to a purchase or repair.

The appraisal and certification service produces a written condition report that documents fret wear, finish condition, neck health, and estimated repair costs. That report is a practical negotiating tool when you’re buying a used or vintage instrument, and it protects you from overpaying for a guitar that needs $400 in fret work. For instruments that need restoration, the acoustic guitar restoration guide outlines the conservative, value-preserving approach Vintage-guitar-world applies to every project. Browse the current inventory of evaluated and restored instruments at Vintage-guitar-world’s shop and request a valuation or testing appointment directly from the listing page.
Useful sources and further reading
- StewMac: fret wear, diagnosis, and repair guidance — the industry-standard reference for fret dressing, refret procedures, and setup diagnostics including fret rocker use.
- MDPI Sensors: effects of string oxidation on properties (2025 study) — peer-reviewed research on how string corrosion and work-hardening affect intonation and wear behavior.
- Play-wear and surface roughness of steel music strings (JANSET) — academic study on stick-slip wear mechanisms in steel strings and how beat count correlates with surface damage.
- Acoustic Guitar: luthier perspectives on strings and performance — practical technician guidance on string changes as a first diagnostic step.
- A1 Trade & Loan: how to spot fret wear when buying a used guitar — concise buyer-focused inspection checklist.
- Tuneluma: how to check if guitar frets need replacement — symptom-to-repair decision guide.
- Rothko and Frost: authentic wear pattern locations — useful for distinguishing genuine wear from artificial relicing.
- Gear Aficionado: protecting your guitar from belt and button wear — practical prevention tactics for finish wear.
- Vintage-guitar-world: guitar appraisal explained — how professional valuation works and when to request one.
- Vintage-guitar-world: guitar restoration workflow — step-by-step restoration process for players and collectors.
- Vintage-guitar-world: why condition impacts vintage guitar value — how wear and condition translate into market value for vintage instruments.