













TL;DR:
- Guitar fretwork involves maintaining and repairing frets to ensure accurate intonation and smooth playing. It is divided into dressing, leveling, crowning, polishing, and refretting, with each suited for different fret conditions. Proper and conservative fretwork is essential to preserve a guitar’s value and playability.
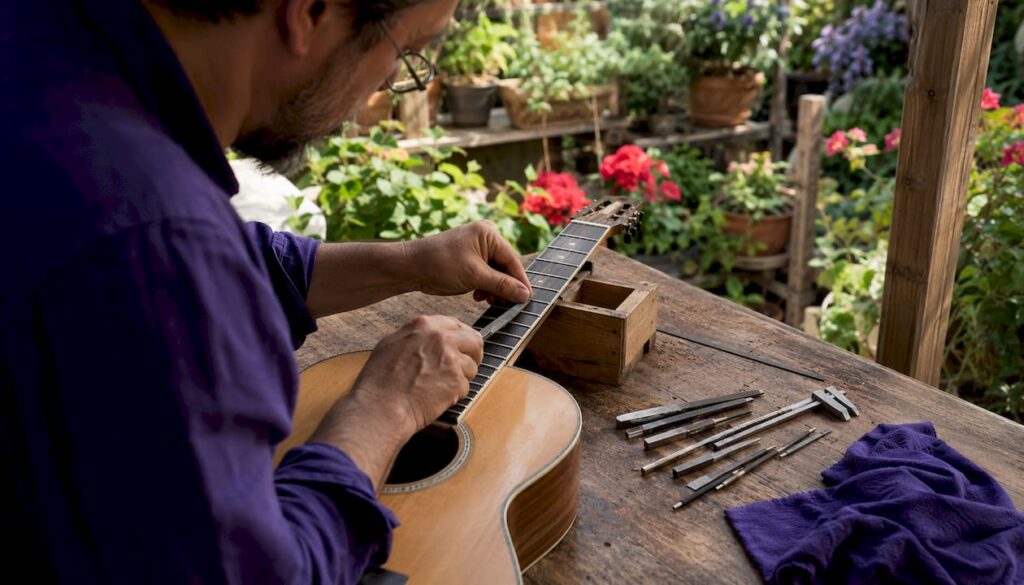
Guitar fretwork is the set of tasks that keep your frets level, correctly shaped, smooth, and properly seated so strings stop cleanly and intonation stays accurate. When frets are in good shape, you barely think about them. When they’re not, everything from buzz to sharp bends to tuning drift traces back to that metal strip under your fingers.
Three quick things worth knowing before you read further:
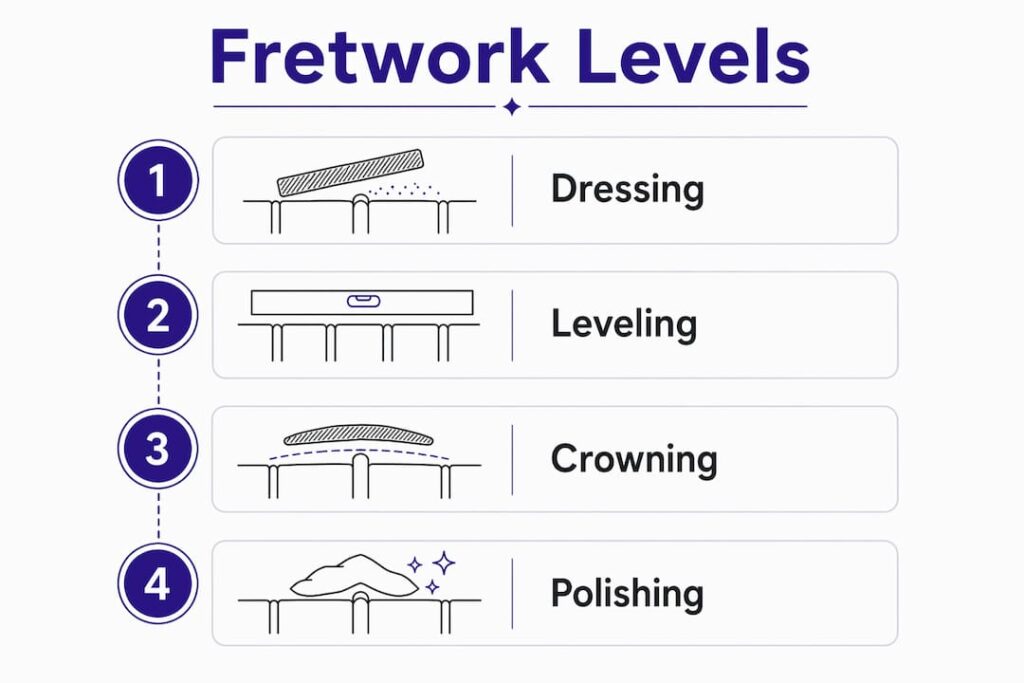
- Fretwork breaks into three levels: dressing (Level 1), leveling/crowning/polishing (Level 2), and refretting (Level 3).
- A commonly used shop threshold: frets worn to under .025 inches at their lowest point are candidates for replacement.
- Fretwork is typically the last stage of a setup, not the first.
Pro Tip: Fret material removal is one-way. Once metal is gone, it’s gone. A conservative approach, removing only what’s necessary and measuring carefully, keeps your options open and delays the need for a full refret.
Table of Contents
- What does guitar fretwork actually cover?
- Why fret condition controls how your guitar plays and sounds
- The three levels of fretwork: which one does your guitar need?
- Where fretwork fits in a full guitar setup
- Tools, fretwire types, and what a DIYer realistically needs
- When to DIY and when to hire a luthier
- How to make your frets last longer
- How to tell if your frets need work right now
- Key Takeaways
- Why conservative fretwork is the right philosophy
- Vintage-guitar-world’s fretwork and restoration services
- Useful sources for further reading
What does guitar fretwork actually cover?
Fretwork is a broad term. StewMac describes it as a “big umbrella” covering everything from simple polishing to major surgery on twisted necks. In practice, it breaks into these component tasks:
- Dressing: Smoothing sharp fret ends, cleaning oxidation, and minor shaping.
- Leveling: Filing fret tops to a common plane so no single fret sits higher than its neighbors.
- Crowning: Re-shaping each fret’s rounded profile after leveling flattens it.
- Polishing: Buffing frets to a smooth, slick finish that lets your hand glide freely.
- Refretting: Pulling all frets and installing new wire.
What fretwork does not include: nut slot adjustment, truss rod relief, bridge saddle height, or electronics. Those are setup neighbors. They interact with fret condition, but diagnosing them separately is how a good tech avoids grinding frets that didn’t need it.
Shops use several terms interchangeably on invoices: “fret leveling,” “level crown and polish,” “fret milling,” “G and P,” and “fret dressing” all generally refer to the same Level 2 procedure.
Why fret condition controls how your guitar plays and sounds
Fret condition directly controls note clarity, action potential, and intonation. A guitar with worn or uneven frets can’t be set up properly, no matter how well the nut and saddle are cut. As Acoustic Guitar puts it, a setup is only as good as the fretwork beneath it.
The effect on tone is real. Flat spots and pits change where the string contacts the fret, which shifts the vibrating length slightly and throws intonation off. Buzz from a high fret isn’t just annoying; it kills sustain and muddies chords. Proper fretwork can restore an instrument’s responsiveness dramatically when done correctly.
Capo users take note: Capos accelerate fret wear because they clamp strings with far more concentrated pressure than fingers do, creating deep pits and flat spots faster than normal playing. Adjustable-tension capos reduce this damage compared with fixed-clamp models.
Pro Tip: Before attributing buzz or intonation problems to frets, check whether a capo is causing “back buzz” between the nut and the capo position. A luthier can often fix this with a nut adjustment rather than fret leveling.
The three levels of fretwork: which one does your guitar need?
| Level | Main Tasks | When to Choose It | Quick Signs |
|---|---|---|---|
| 1 – Dressing | Clean ends, smooth sharp edges, light polish | Routine maintenance, sharp fret ends, mild oxidation | Scratchy feel on fret ends, dull surface |
| 2 – Leveling/Crowning/Polishing | Level tops, re-crown, polish | Buzz from uneven frets, flat spots, moderate wear | Buzz on specific frets, visible flat tops |
| 3 – Refretting | Remove and replace all fretwire | Deep pits, frets too low to level safely | Grooves, intonation drift, worn frets |
Level 1 (Dressing) is the most common and least invasive. It covers cleaning up oxidized or rough frets, smoothing sharp ends that scratch your palm, and a light polish. No material is removed from fret tops. Most players can handle basic end-dressing with the right files and some patience.
Level 2 (Leveling, Crowning, and Polishing) is where real precision comes in. A steel leveling beam grinds the high frets down until all tops sit in the same plane. That process leaves frets flat and unplayable, so each one must be re-crowned individually. As Premier Guitar explains, leveled frets must be re-crowned to restore the narrow contact point that accurate intonation depends on. Polishing follows, which is what gives frets that slick, fast feel. Level 2 is appropriate when frets still have enough height to survive material removal.
Level 3 (Refretting) means pulling every fret and starting fresh. It’s necessary when frets are too worn to level safely, typically when the lowest-worn sections measure under .025 inches. A proper refret also includes fingerboard truing and slot cleaning. Done poorly, it can crack the fingerboard or damage inlays and binding, which is why Acoustic Guitar calls refretting a delicate art best left to professionals on most instruments.
Signs that frets need attention include:
- Buzz isolated to specific frets or positions
- Visible grooves, pits, or flat spots on fret tops
- Intonation that drifts even after saddle adjustment
- Frets that feel sharp or scratchy at the edges
- Fret height visibly lower in high-use positions (typically frets 1–5 and 7–9)
Where fretwork fits in a full guitar setup
Fretwork belongs at the end of a setup, not the beginning. Experienced luthiers confirm the standard sequence: correct nut slots, truss rod relief, and fingerboard geometry first, then address frets. Grinding frets before those adjustments are made risks removing material that wasn’t actually causing the problem.
The diagnostic order most shops follow:
- Check truss rod relief with a straightedge or feeler gauge.
- Inspect nut slot depth and string spacing.
- Set bridge/saddle height to target action.
- Evaluate fingerboard geometry for any back-bow or twist.
- Only after the above: assess fret levelness and condition.
- Perform fretwork at the level the frets require.
- Final setup check: action, intonation, and playability.
One exception worth knowing: severe fret protrusion caused by humidity changes (frets sticking out past the fretboard edges) may need to be addressed earlier, since those sharp ends can make the guitar unplayable before any other adjustment is useful. For a deeper look at how fretwork connects to overall guitar setup and playability, the relationship between each step matters more than most players realize.
Tools, fretwire types, and what a DIYer realistically needs
Professional fretwork requires specific tools. Here’s what luthiers actually use:
- Radiused leveling beam: A long, flat file matched to the fretboard radius; ensures level removal across the curve.
- Crowning files: Narrow files that re-shape the rounded fret profile after leveling.
- Fret pullers: Specialized pliers that lift frets cleanly without tearing the fingerboard.
- Tang nippers: Trim fret tang ends for bound fretboards.
- Slot cleaners: Remove old glue and debris from fret slots before refretting.
- Radius cauls: Curved cauls that press frets evenly into slots during installation.
- Feeler gauges and straightedges: For measuring relief and fret height precisely.
On fretwire materials: most frets are 18% nickel-silver, which is softer than steel strings and wears gradually. Stainless steel frets last significantly longer, but the trade-off is that the wear shifts to your strings instead, which can increase string-break frequency. Fretwire also comes in different tang widths; incorrect sizing causes frets to lift or crack the fingerboard if installed improperly, which is one reason DIY refretting carries real risk.
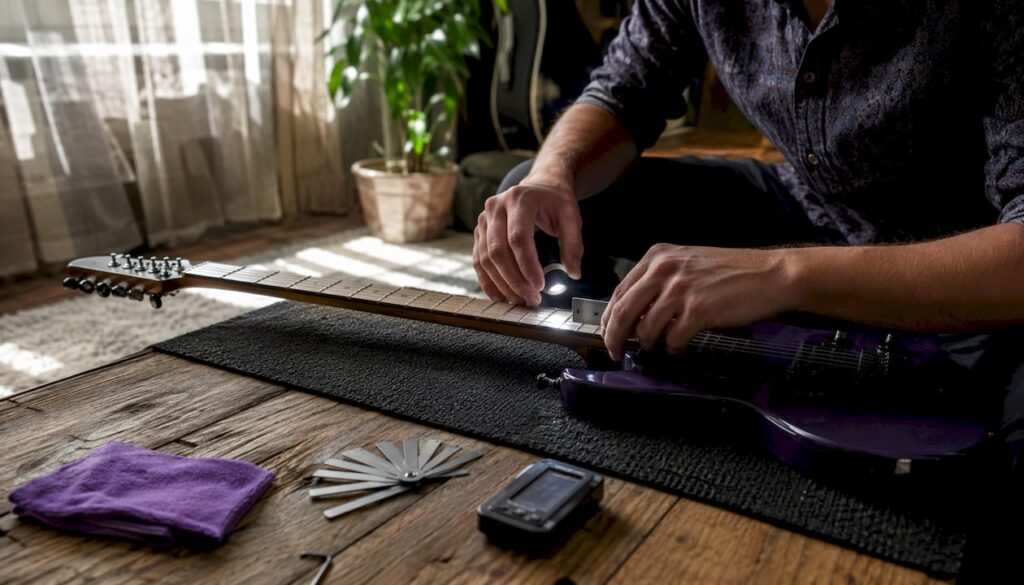
For DIYers, Level 1 tasks are genuinely accessible with a fret end file, some Micro-Mesh abrasive, and a polishing cloth. Level 2 requires a leveling beam, crowning files, and the skill to use them without removing too much material. Level 3 is professional territory for most players.
Pro Tip: Measure fret height before and after any leveling. Knowing exactly how much material you’ve removed tells you how many more levelings the frets can survive before a refret becomes unavoidable.
When to DIY and when to hire a luthier
DIY is reasonable for Level 1 work: cleaning fret ends, polishing, and minor touch-ups. Level 2 and Level 3 almost always justify hiring a pro unless you have proper tools and hands-on training.
Red flags that mean call a luthier:
- Deep pits or grooves that a level can’t fix
- Loose or lifting frets
- Any fingerboard damage or cracks near fret slots
- Vintage or high-value instruments where cosmetic damage matters
- You can’t confidently diagnose whether the problem is frets, nut, or neck relief
U.S. ballpark costs (these vary by region, instrument type, and shop):
- Level 1 (Dressing): $40–$80, typically done same-day or within a day.
- Level 2 (Level/Crown/Polish): $80–$175, usually 1–3 days turnaround.
- Level 3 (Refret): $200–$500+, often 1–2 weeks depending on fingerboard work needed.
Before handing over an instrument, ask the luthier:
- How many refrets have you done on this type of instrument?
- Do you press or hammer frets in?
- Do you true the fingerboard before installing new frets?
- What’s your warranty on the work?
- Will you give me a written estimate before starting?
Understanding why luthiers are essential to instrument quality helps frame what you’re actually paying for when you hand over a guitar.
How to make your frets last longer
Simple habits extend fret life considerably. Capo choice and string hygiene matter more than most players think.
Daily and weekly habits:
- Wipe strings and fret tops after every session with a dry cloth.
- Use a string cleaner (like Fast Fret or similar) to reduce metal-on-metal abrasion.
- Switch to an adjustable-tension capo; adjustable capos reduce fret damage compared with fixed-clamp models.
- Avoid leaving a capo clamped on the neck when the guitar is not in use.
- Change strings regularly; dead strings with rough windings accelerate wear.
Heavier string gauges and aggressive playing styles (lots of bending, heavy fretting pressure) wear frets faster. If you record frequently and want clean, buzz-free takes, keeping frets in good shape pays off directly in the studio. For tips on getting the best sound once your frets are dialed in, recording guitars properly is worth reading.
Pro Tip: Inspect your frets visually every 6–12 months depending on how much you play. Run a finger along each fret top and feel for flat spots before they become pits. Catching wear early means a Level 2 job instead of a refret.
How to tell if your frets need work right now
A short checklist you can run through in ten minutes:
- Listen for buzz: Play each fret on every string. Buzz isolated to one position usually points to a high neighboring fret.
- Check intonation: Tune open, then fret the 12th fret harmonic and the fretted note. Consistent sharp or flat readings across multiple strings suggest fret wear.
- Inspect visually: Use a flashlight at a low angle across the fretboard. Flat spots and pits catch the light differently than a properly crowned fret.
- Feel the edges: Run your thumb along the fret ends. Sharp, scratchy edges mean the frets need at least a Level 1 dressing.
- Measure: Use a feeler gauge or digital calipers on your most-worn frets (usually around frets 1–5). The commonly cited replacement threshold is under .025 inches at the lowest worn point, though professional judgment varies by instrument and playing style.
- Use a straightedge: Lay it across three frets at a time. Rocking indicates a high fret; a gap indicates a low one.
Simple tools needed: a flashlight, a metal straightedge, and a feeler gauge. You don’t need a full shop setup to know whether a professional visit is warranted.
Key Takeaways
Guitar fretwork is the final stage of a proper setup, and frets worn below .025 inches are the standard threshold for replacement consideration.
| Point | Details |
|---|---|
| What fretwork is | The set of tasks (dressing, leveling, crowning, polishing, refretting) that keep frets level, shaped, and smooth. |
| Three levels | Level 1 is dressing; Level 2 is leveling/crowning/polishing; Level 3 is a full refret. |
| The common replacement threshold | Frets that are worn below .025 inches at their lowest point are typically candidates for replacement. |
| DIY vs. pro | Level 1 is DIY-friendly; Level 2 and Level 3 usually require a trained luthier and proper tools. |
| Vintage-guitar-world | Vintage-guitar-world offers testing appointments, valuation, and restoration services for players who need expert fretwork assessment on vintage or collectible instruments. |
Why conservative fretwork is the right philosophy
Most fretwork guides focus on technique. What they understate is the irreversibility of the work. Every time a luthier levels frets, material is gone permanently. That means every Level 2 job shortens the remaining life before a refret becomes necessary. A tech who levels aggressively to chase a minor buzz may be solving a $100 problem by creating a $400 one.
The right approach is diagnosis first, intervention second. Many buzz complaints trace back to nut slots, truss rod relief, or a single high fret, none of which require touching the other 21 frets. A conservative luthier measures before filing, removes the minimum necessary, and tells you honestly when a problem doesn’t actually need fretwork at all.
For vintage instruments, this matters even more. The playability of a 1960s guitar depends on frets that have already been leveled once or twice. Knowing how much height remains before a refret is unavoidable is part of understanding what the instrument is worth and what it can still handle. That’s the kind of assessment Vintage-guitar-world brings to every instrument it evaluates.
Vintage-guitar-world’s fretwork and restoration services

Fretwork on a vintage or collectible guitar isn’t just a repair decision. It’s a value decision. A poorly executed refret on a 1950s archtop or a rare classical guitar can reduce its worth more than the wear it was meant to fix. Vintage-guitar-world approaches every instrument with that in mind: careful diagnosis, conservative material removal, and restoration practices that protect what makes the guitar worth keeping.
Available services include in-person guitar testing appointments, professional guitar appraisal, and certification for collectors who need documented condition assessments before or after restoration work. If you’re weighing whether fretwork is worth it on a specific instrument, getting a valuation first is the right move. Contact Vintage-guitar-world to book a consultation or testing appointment before committing to any major fret work.
Useful sources for further reading
- StewMac — Essential Fretting Tools and Techniques: Detailed video and written guide covering all three fretwork levels and the tools each requires.
- Acoustic Guitar — Ask the Expert: When Is It Time for a Re-Fret?: Practical Q&A on refret timing, back buzz diagnosis, and fret material trade-offs.
- Premier Guitar — Understanding Frets and Fret Wear: Covers capo wear acceleration, fretwire dimensions, and leveling/crowning procedures.
- Pearson Instruments — Fretwork: Source for the .025-inch wear threshold and refret consultation guidance.
- Acoustic Guitar — The Delicate Art of Fretwork: Expert perspective on why refretting vintage instruments requires professional care.
- Rhett’s Frets — Proper Fretwork Matters: Accessible overview of how correct fretwork improves feel and playability.